We left the model with different sub-assemblies: cockpit, engines, intakes, wings and weapons completed.
The AMK F-14D will also be converted to a F-14B of VF-103. Ultimately it should look close to this bird:

As with the Tamiya F-14, there is a moment where there is no point building the two models alongside. This happened about right at the moment the TPS scheme was started.
So I assembled the wings and painted the red under moving surfaces, assembled intake ramps (subsonic) and mated them to the bottom surface, assembled the beaver tail with closed speedbrakes and the tails.
I’ll keep on painting with the sub-assemblies separately. It may sound stupid but unlike what many have said, the fit is pretty good and IMHO up to par with Tamiya. The main difference is that with a Tamiya model you don’t have to be careful it will be perfect anyway. Here it was indeed carefully checked many times. But in the end, only minor touch ups were required. Touch ups on a TPS scheme is a good thing anyway as you’re basically doing on your models what the navy guys are doing on the real aircraft during deployment.
All the top surfaces received a coat of MRP-105 as base colour after a black pre-shading. I then sprinkled some salt and sprayed MRP smoke (MRP271) which I heavily diluted with Mr colour levelling thinner.
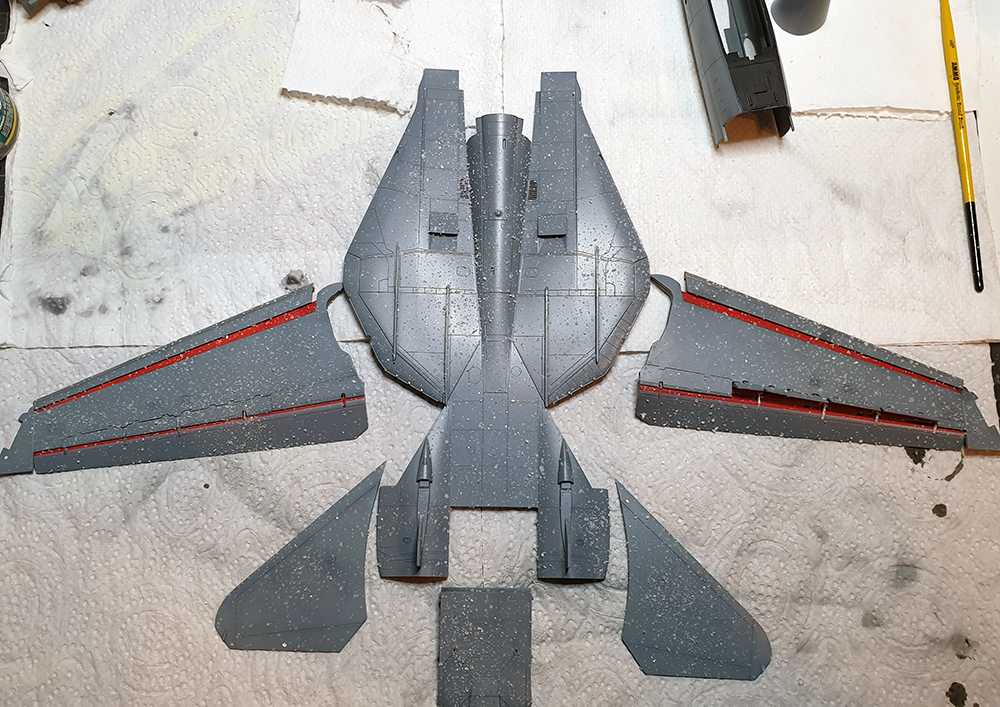
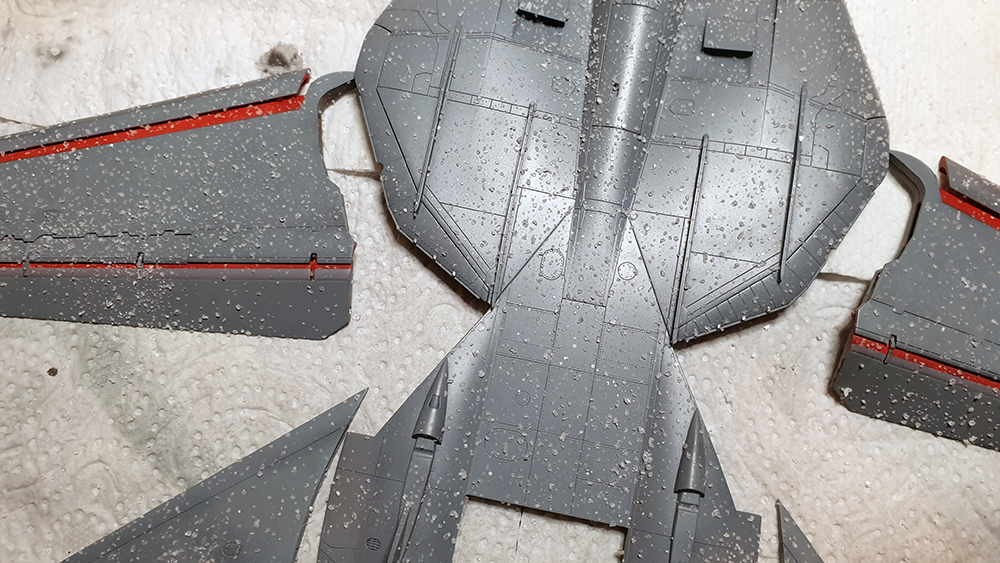
After the subtle smoke/salt, I painted some panels or panel lines with a lighter grey: MRP 97
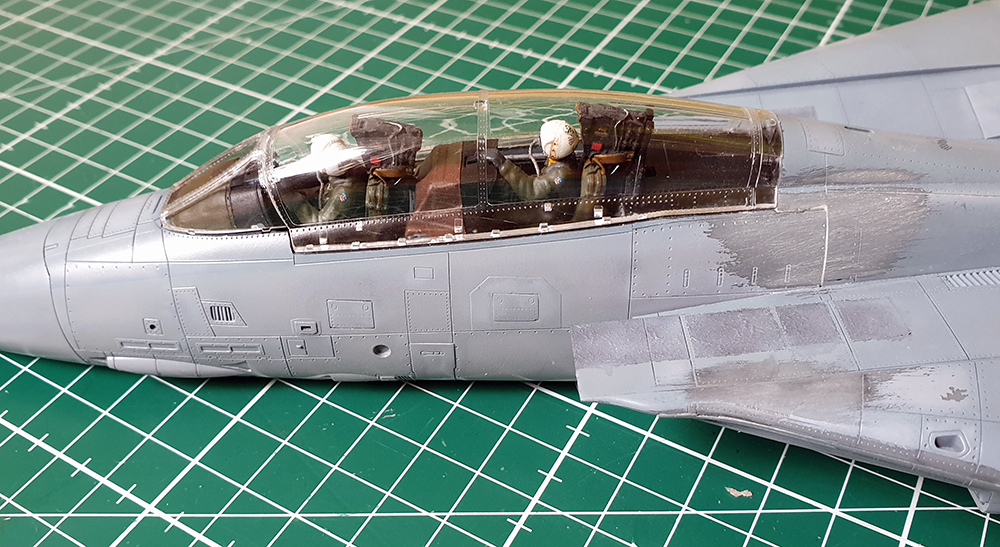
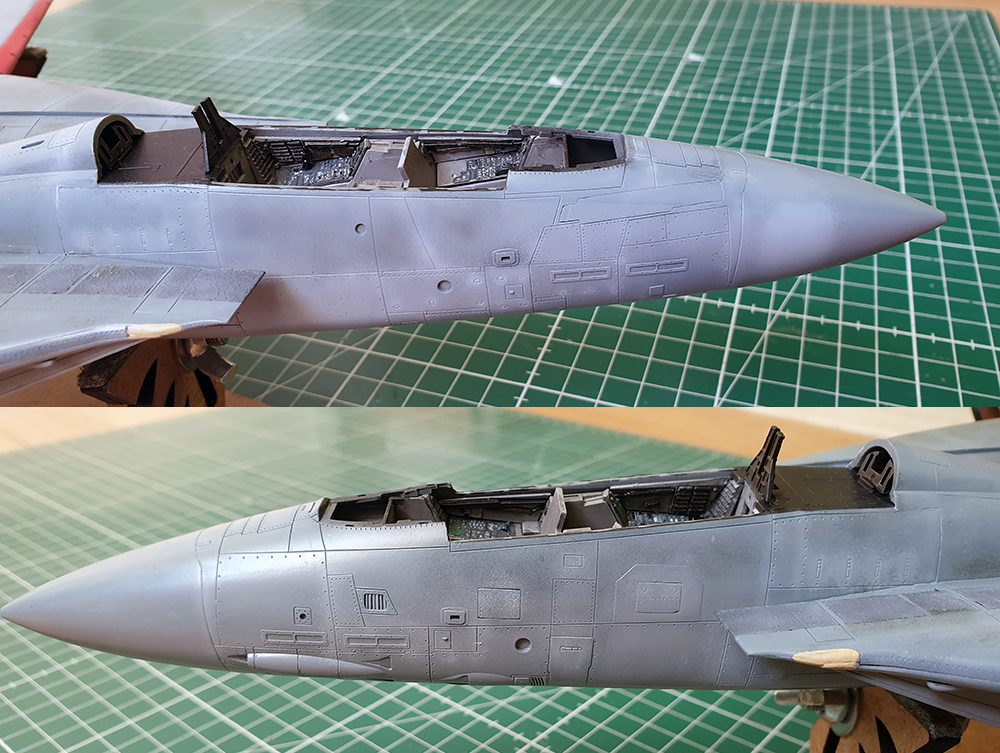
MRP97 is also the colour used for the cockpit section sides.
The separation between the two grey is still quite noticeable in front of the windscreen but I’ll work that out some more. I closed the AAR door and decided to leave it as it is. If it bothers me too much later I can fill the seam with superglue and re engrave it.
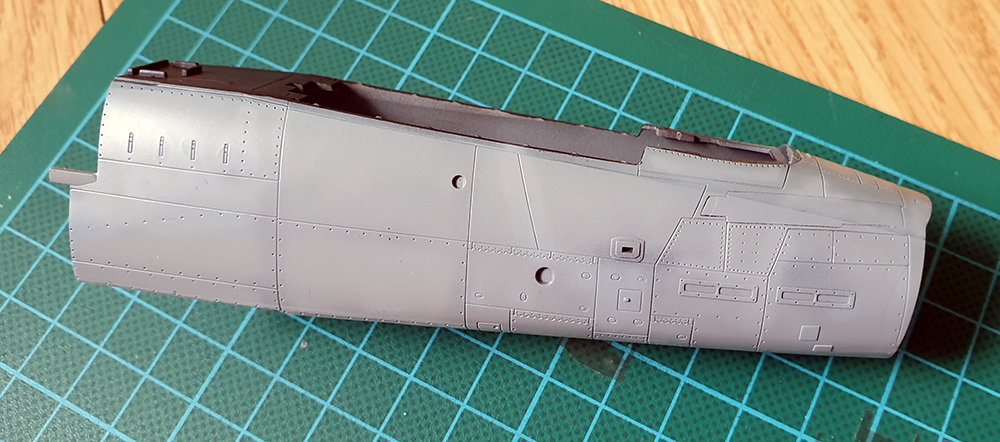
Steps and ladder doors were just closed before painting
The wings received the same treatment. One will have the spoilers up and the other the spoiler down as I want to show the moment flight controls are checked just before launch. Both will be dirty with flaps and slats down.
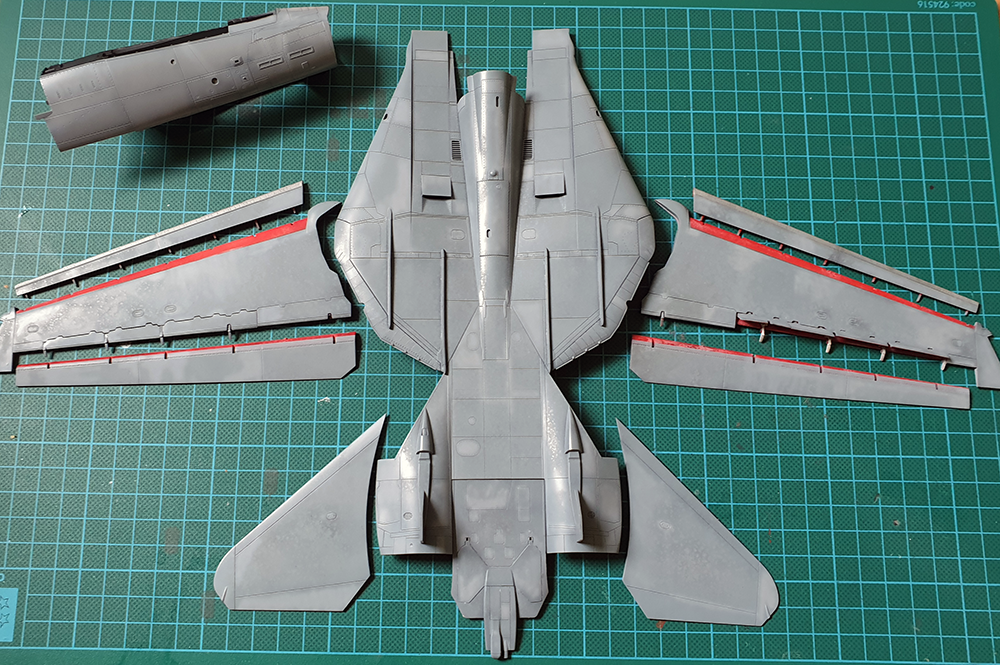
The sub-assemblies were then tested in place to see the possible problems identified by the red arrows. the greens ones illustrate perfect fit as good as Tamiya quality.
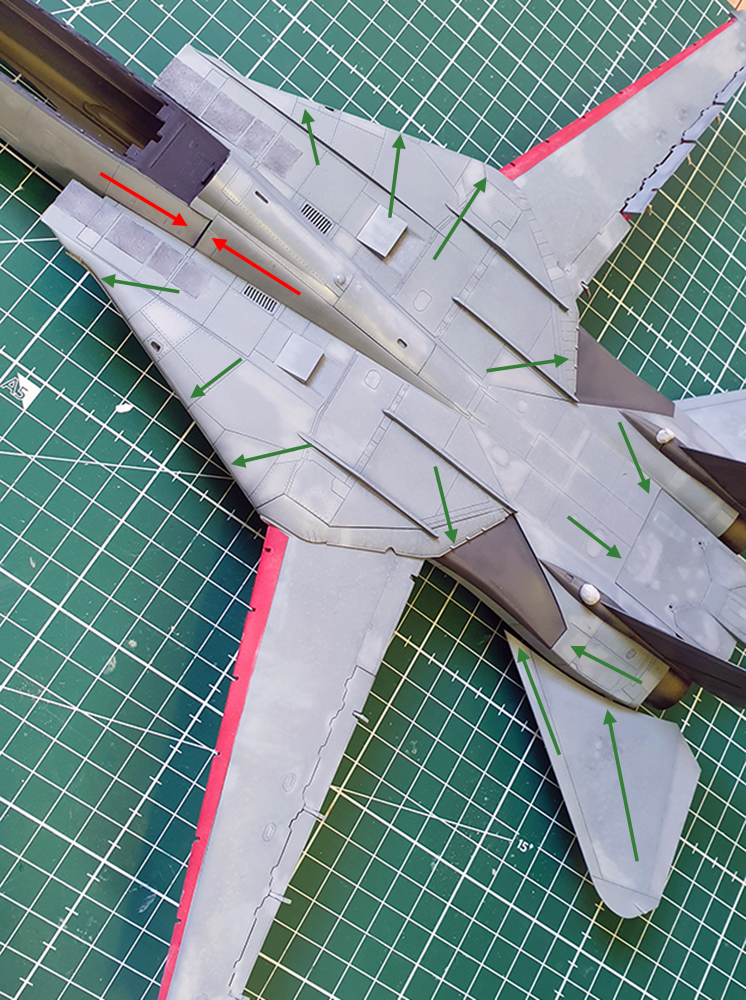
From my testing, it appears that the red area is a problem only if something prevents the top and bottom fuselage to be pressed correctly. Most of the time, the intake ramps are the problem and if you lose a bit of space in there you’ll pay it at the red arrow.
The other possible issue is if the cockpit is not slide completely into the one piece fuselage, the rear small bulkhead of the nose gear well may conflict with the rear bottom fuselage preventing a good fit.
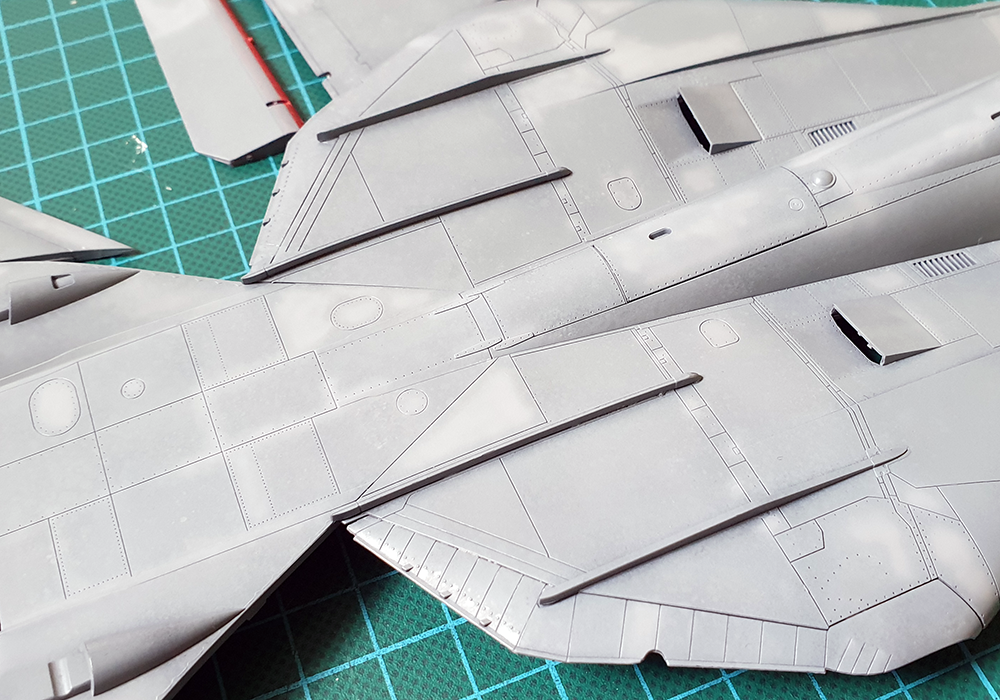
Continuing to paint the sub-assemblies, I made the anti-slip walkway on the top of the intakes:
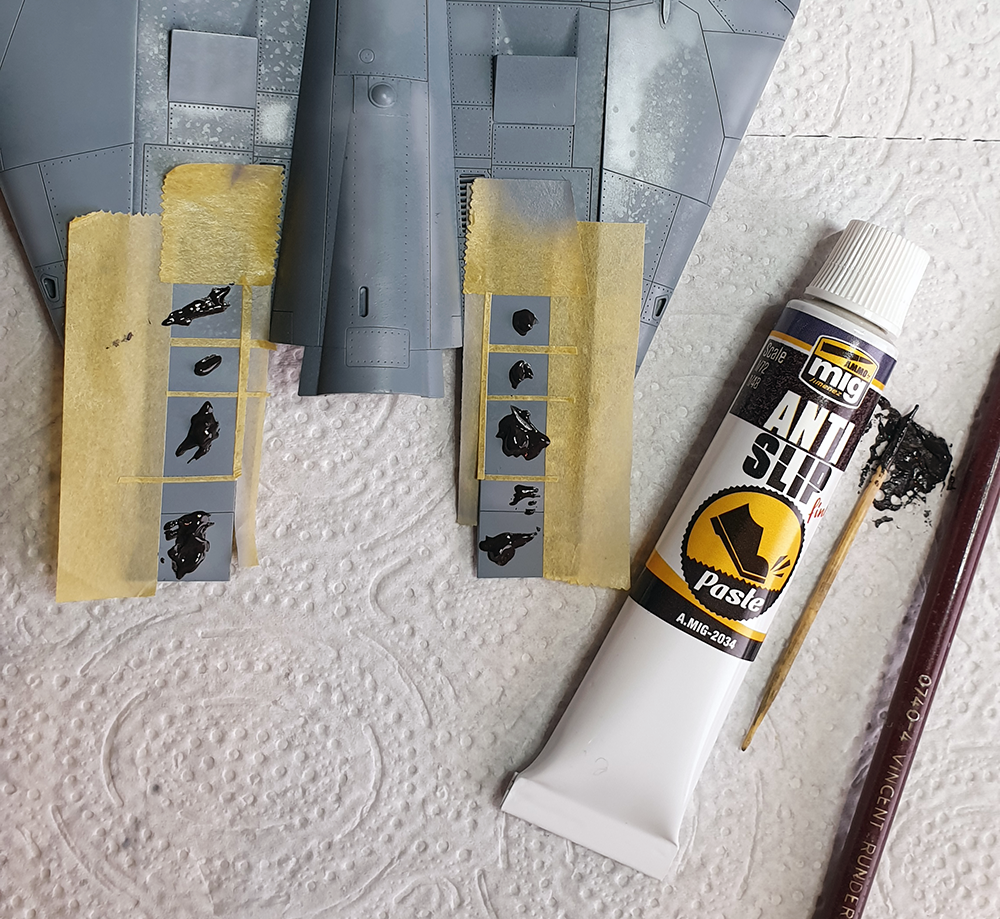
trying out a new product for that. I usually used Rust Oleum texturized paint but this is way too thick for 1/48. So when I found out this product I immediately thought about walkways and thermal coating for US navy bombs.
Using the decal as templates, I masked the walkways and applied a bit of paste in the centre.
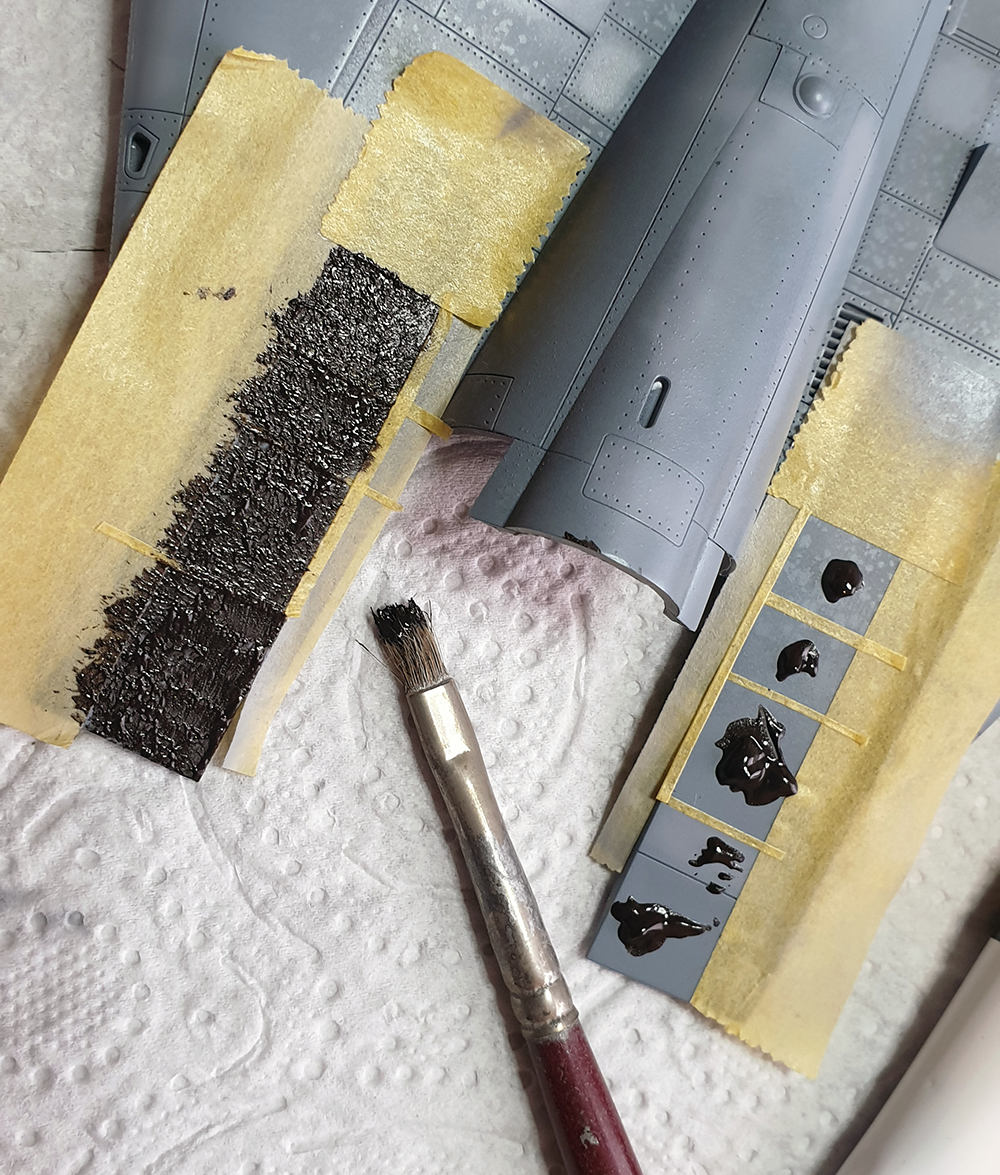
Then using an old brush I painted the walkway texture.
The product remains liquid long enough but is very elastic once dry, so masks should be removed as quickly as possible otherwise it may lift from the plastic on mask removal. That’s usually not a big deal as it easily mates back to the plastic and offer an irregular walkway pattern simulating tear.
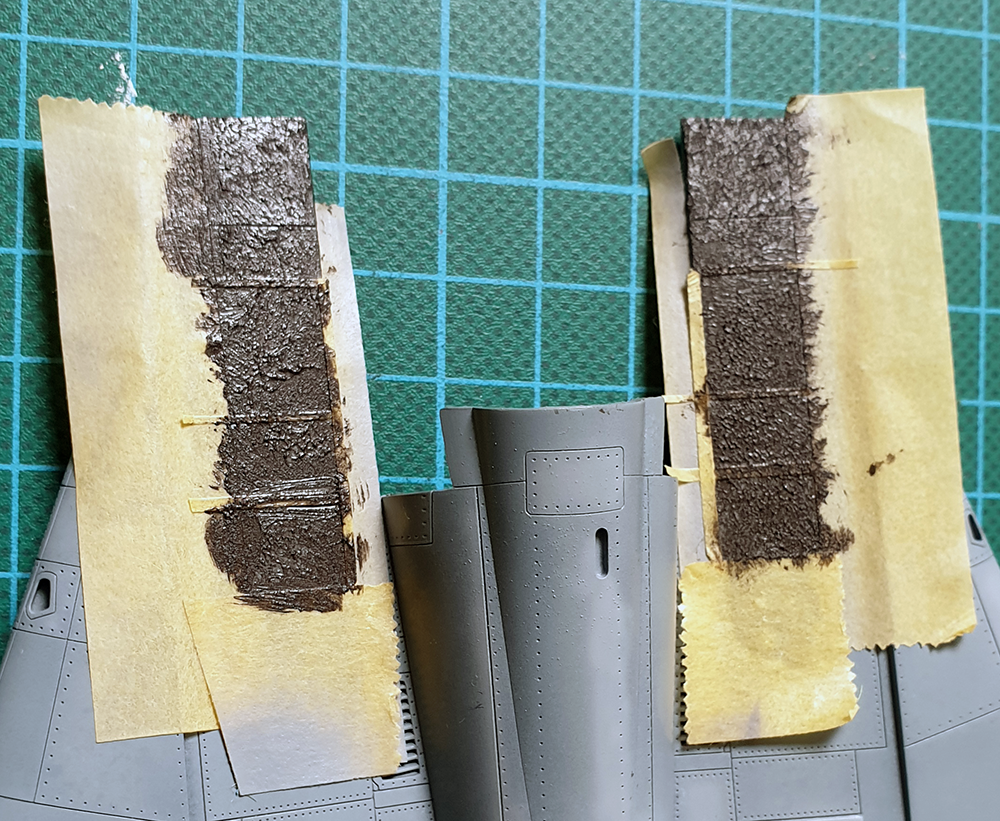
If texture is found to be too coarse, it can be sanded a bit.
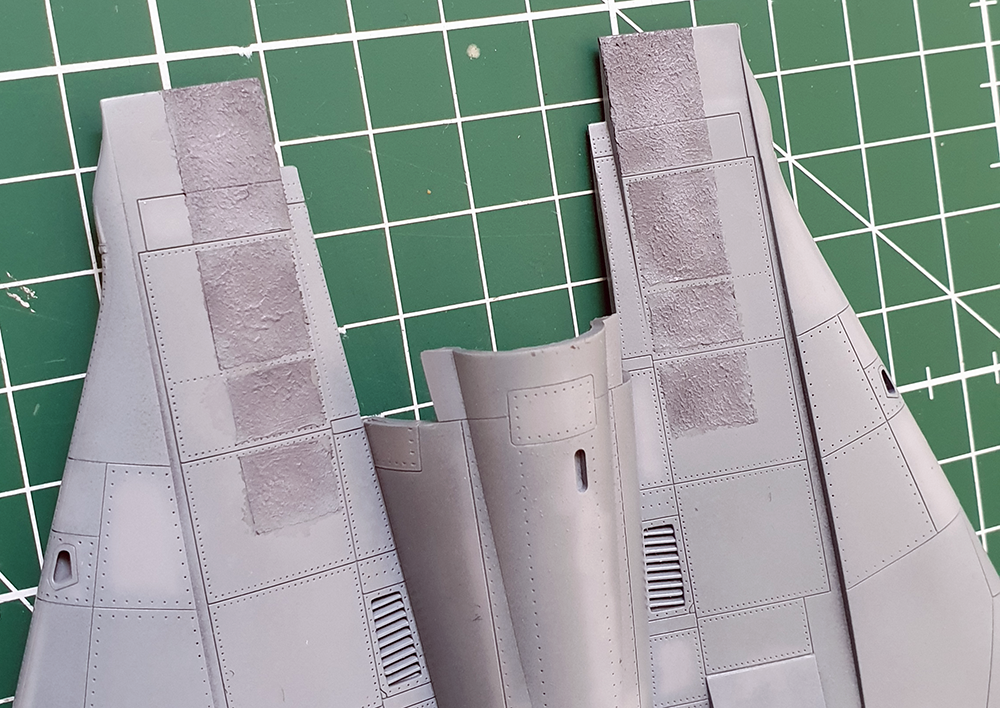
Walkways were quickly painted with Gunship grey before masks removal and then the edges were fading in with the fuselage base colour. Still some more work required but I will leave that for later paint corrosion control.
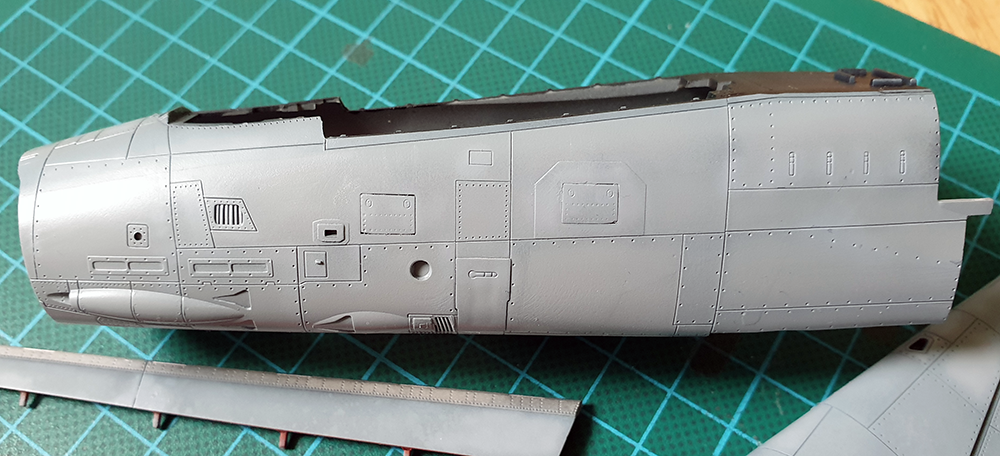
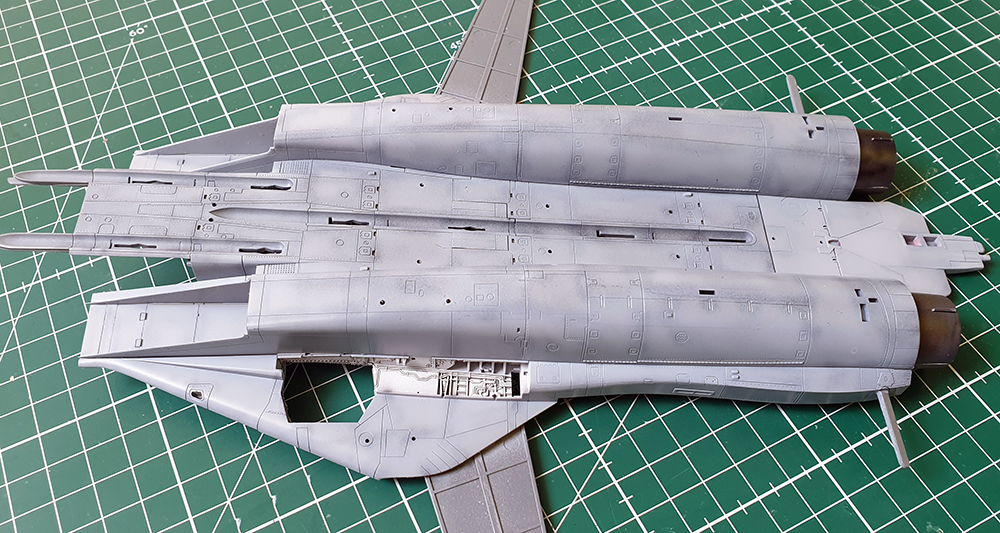
Bottom fuselage has been assembled with intake trunks, boat tail with closed speed brake, engine trunks and intake doors. The whole was pre-shaded in black then painted with MRP-38
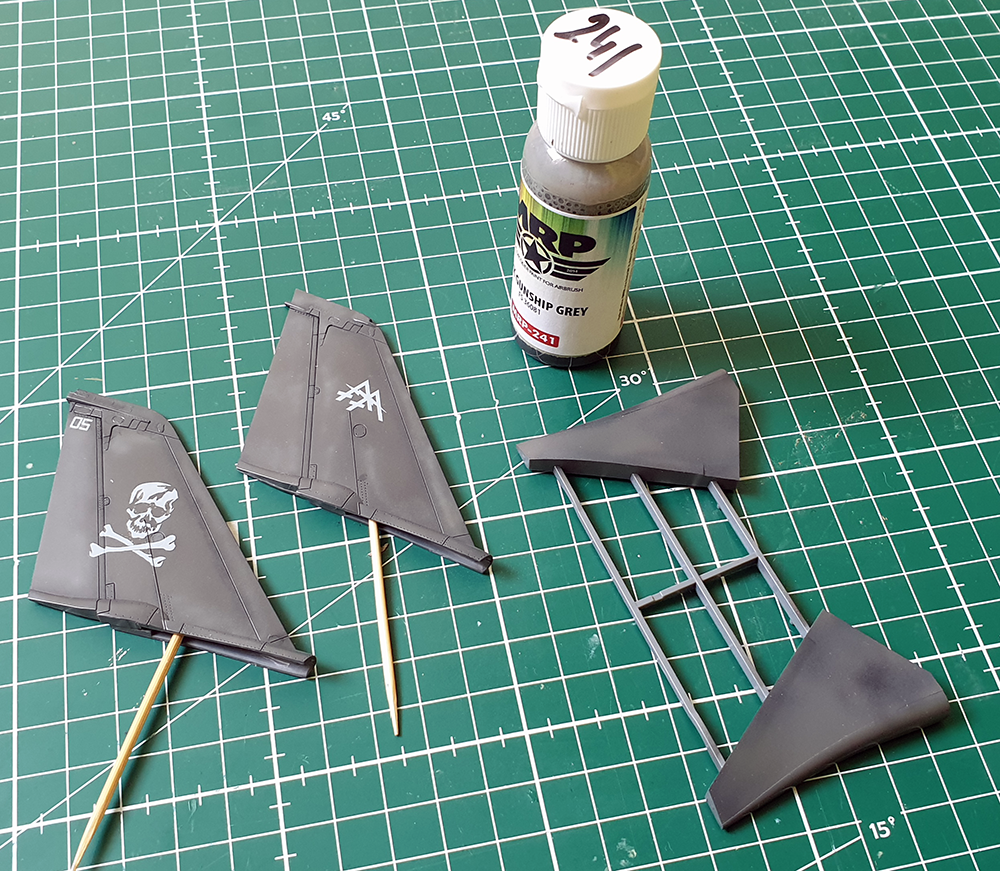
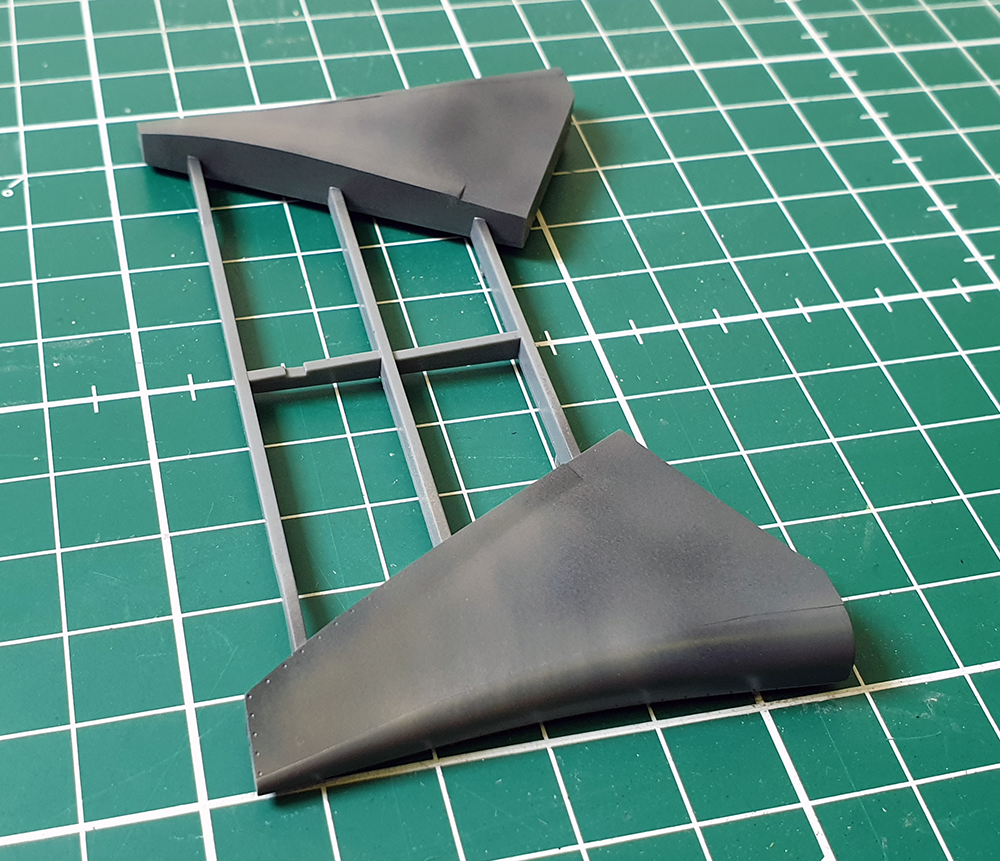
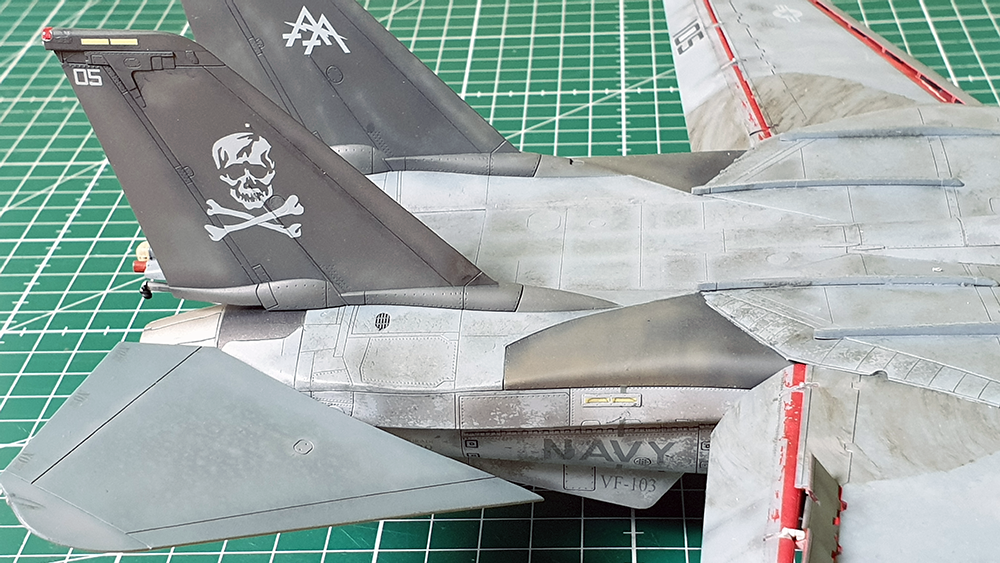
Tails were also assembled, pre shaded in black, painted with MRP-241 and spot post shaded with a lighter tint and immediately decaled, this is always a great motivation factor. I must say the FighterTown Decals are great. Super thin and sliding perfectly with absolutely no carrier film visible.
The MRP-241 painted bladders received some shadows (MRP Smoke) and highlights (XF-57 Buff)
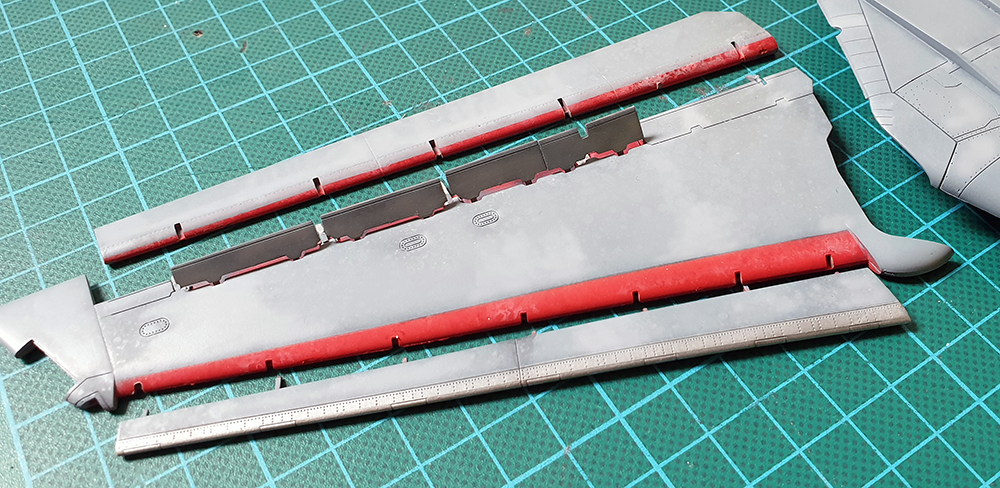
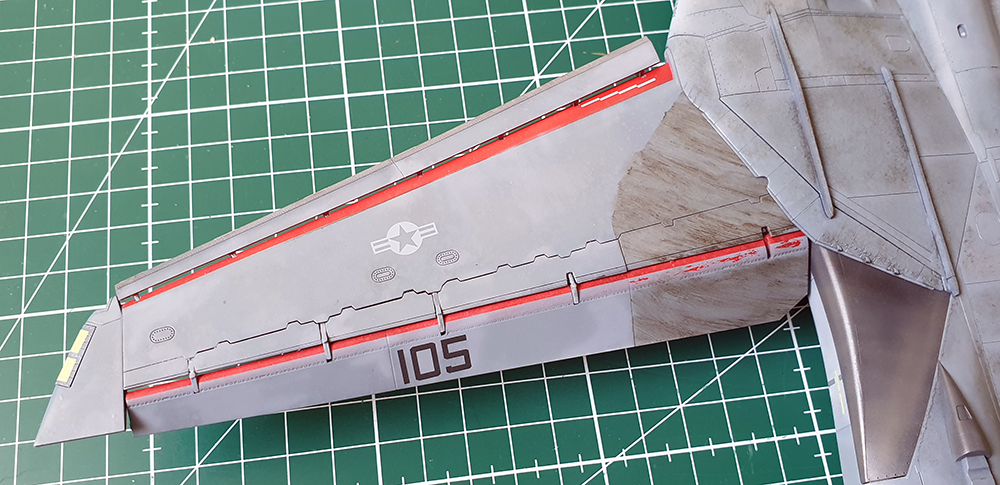
And the reason why I wanted to start painting before assembling was to be able to weather the inner top and bottom wings before attaching them on their respective spars

This was done with Starship filth hand brushed in the pivot direction as explained on Part 6 finishing the Tamiya F-14. Note the tail flap coloured grey higher than the full flap position and scratched through the red simulating the friction of the moving parts (Yes, I lost a hinge…)
The cockpit Instrument panels need some modification from Delta to Bravo.
Initially I wanted to use the Hasegawa bits but to keep the better AMK glare shields I finally decided to use the AMK IP as a starting base.
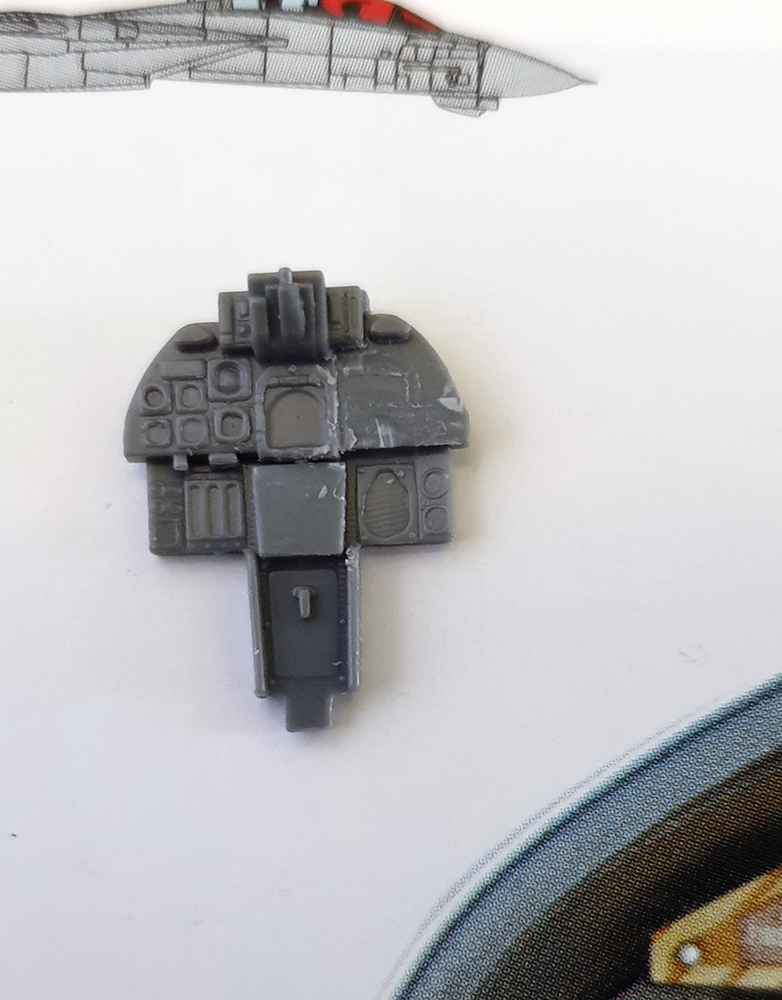
The pilot IP was flattened right and below the centre screen
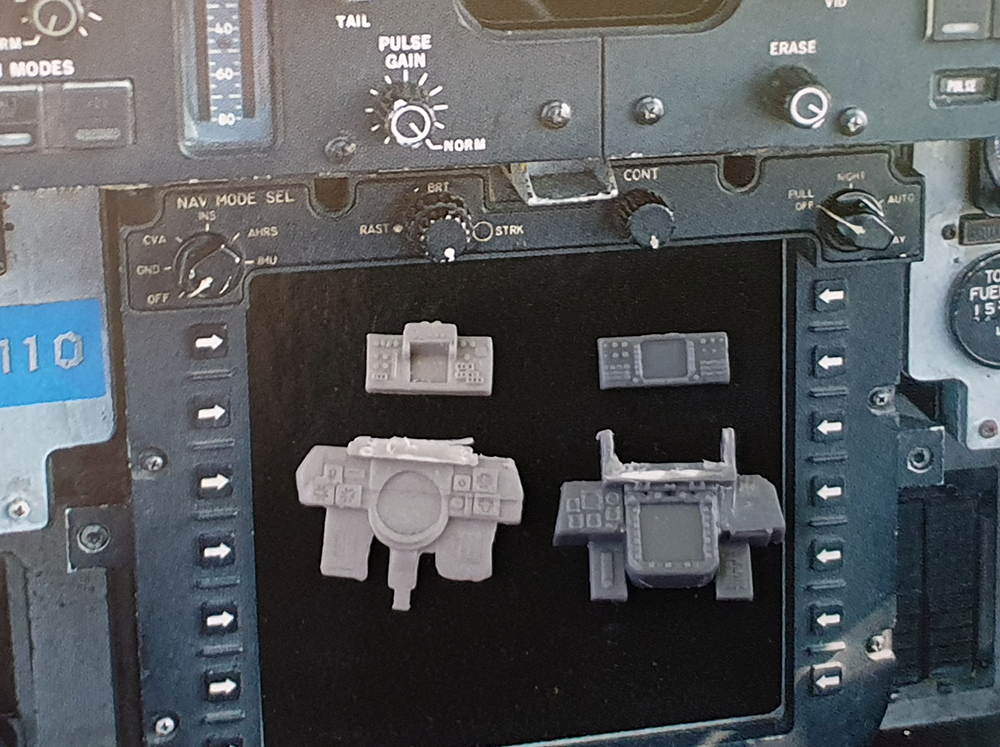
The RIO panel was cannibalized from a Hasegawa Tomcat to salvage the top part which was mated to the AMK part.
The right side of the big square screen was flattened as well.
The Round screen was replaced with the big square one as the F-14B were upgraded to Lantirns. So Victory 105 should have the square screen.
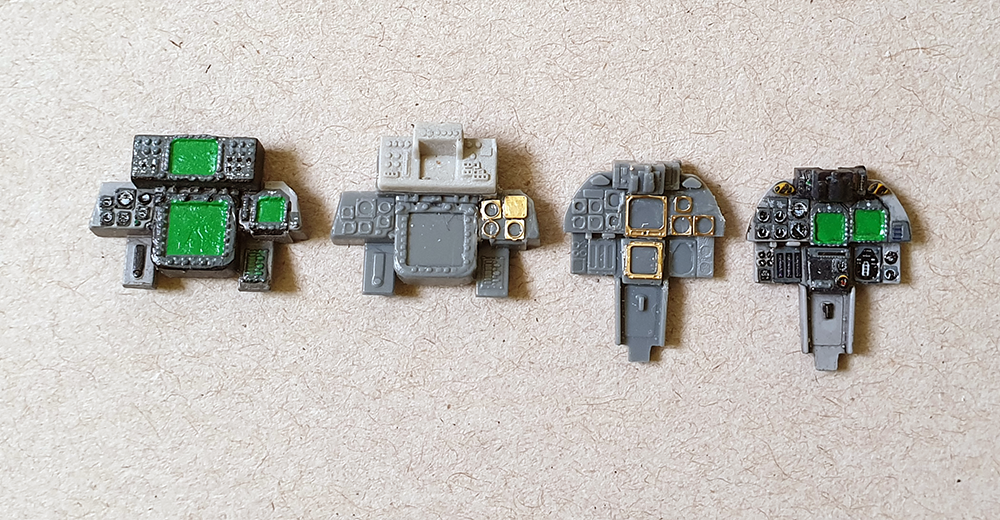
The PE instrument from Airscales were added to the F-14B IPs (centre). The outboard ones are for another AMK F-14D model I’m building as well
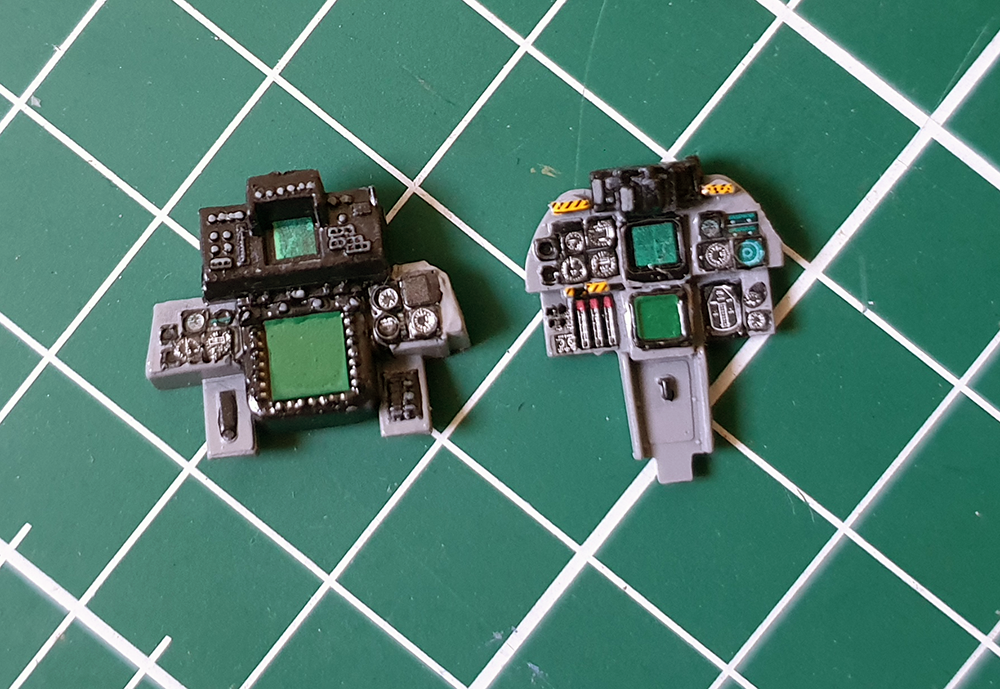
Finally FighterTown stencils decals were applied to the converted IPs.
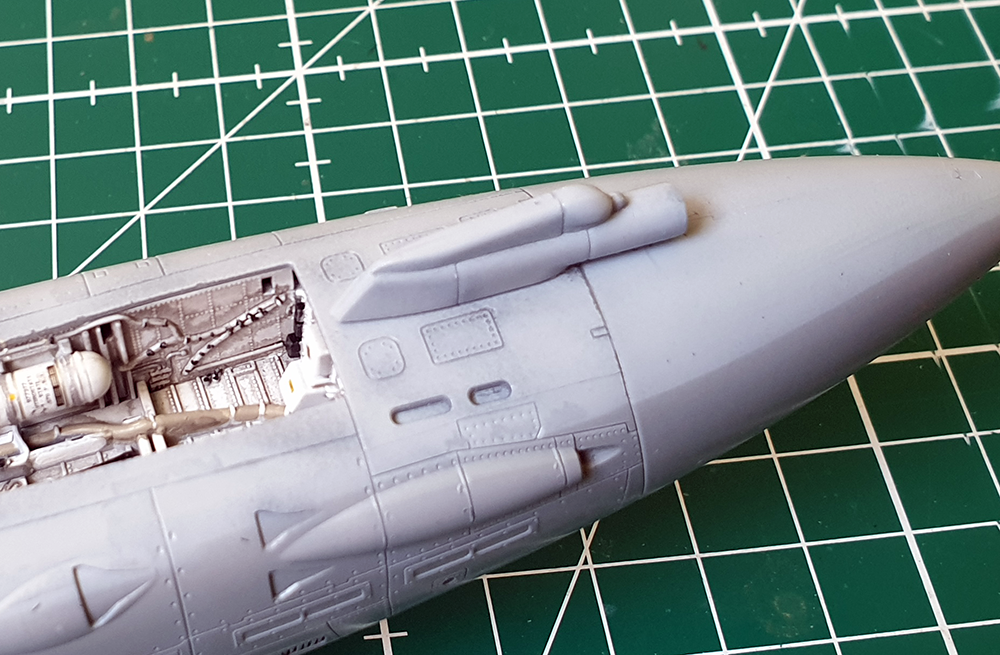
Continuing the Bravo conversion, the intake blisters typical of the B model were also added from the Hasegawa bits:

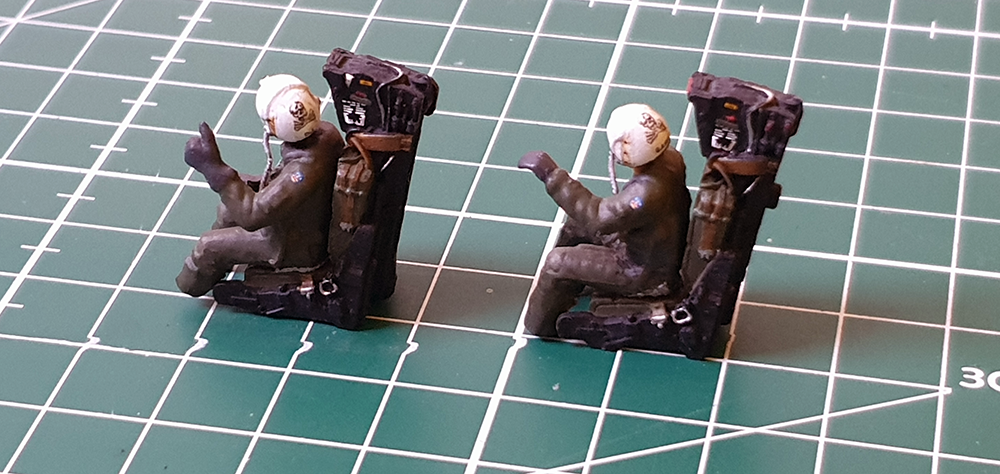
And to finish the Bravo conversion, old GRU-7 resin seats & pilots are being worked on.
Pilots are from the scrap box as unfortunately AMK doesn’t provide them – which is weird considering the huge flexibility of their tomcat poses.
Helmets decals are custom made; flight suit decals come from the Fighter Town stencil sheet
The sub-assemblies have finally been glued together. As expected the biggest issue was the fuselage joint line just aft of the canopy needing a bit of sanding. The rest was pretty good and required just very light sanding.
I tested both canopy option. The first one was the plastic frame with the two transparencies which presented the advantage of not having seam lines. Problem is that closing this one requires quite a bit of modifications as the frame seems to be too long to fit closed. Fitting was too much of a problem and the part was discarded. It’s basically designed for an open canopy.
The second option is not quite better unfortunately. If the full transparent canopy fits better when closed, there are ugly seam lines on both sides of the transparency. These are very subtle but once I saw them there was no turning back. The seam lines were sanded away then the canopy underwent a long session of fine sanding and polishing.
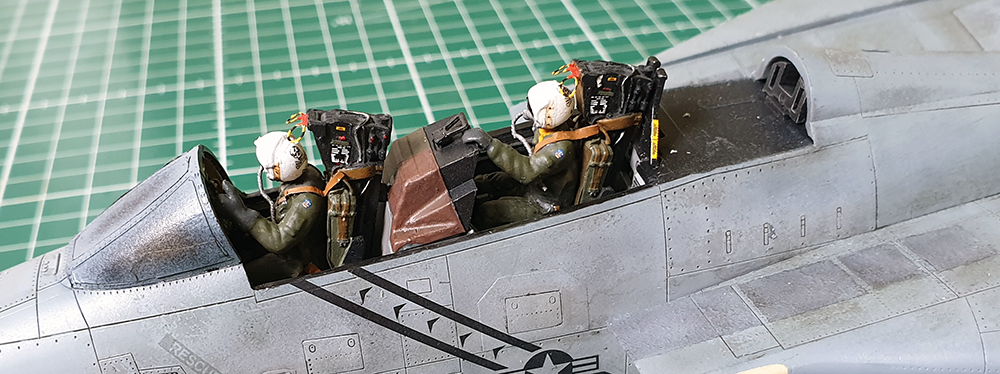
Test fit of the pilots in their seat with closed canopy.
The gear legs were also assembled, painted and I used lots of stencil’s decals from that Fighter Town sheet

These will be detailed a bit more in due time.
I was tempted to reuse the F-14A wheels from the Tamiya kit. Thinking a Bravo should have the earlier wheels. But Bryan from FighterTown decals set me straight just in time stating that the late B (Lantirn) certainly had the later wheels. I will nevertheless re use the Tamiya nosewheel as there is a rather big difference in size from one to another.
Something important to note when building the AMK kit regarding the nose gear. It’s very tight to insert into the hole in the well. If it goes unnoticed, it can screw the stance of the tomcat (especially when kneeling on the catapult) with a too long nose gear. either enlarge a bit the nose well hole or sand a bit the top of the nose gear leg to ensure it goes all the way.
The last part of the Bravo conversion was salvaged from an old Hasegawa kit:
Next order of business was having a bit more fun with weathering.
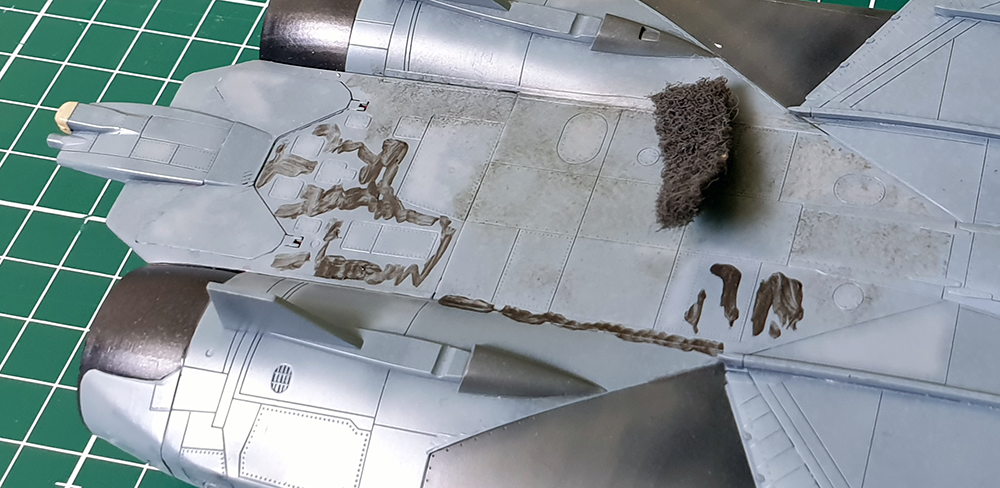
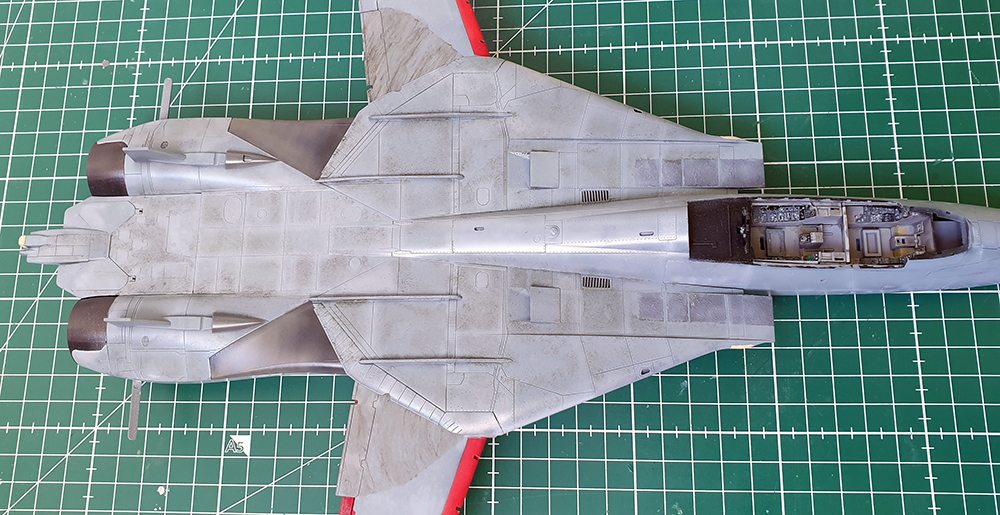
I wanted to make the heavy weathering on the top fuselage trying a new technique.
I started by applying Starship grime and dark grey navy wash with a brush in centre of some panels, alternating colour variations.
Before the paint dried, I tapped the paint with a sponge bit with only vertical movement avoiding side moves.
Work was done panel by panel leaving some untouched and varying the intensity from one panel to another.
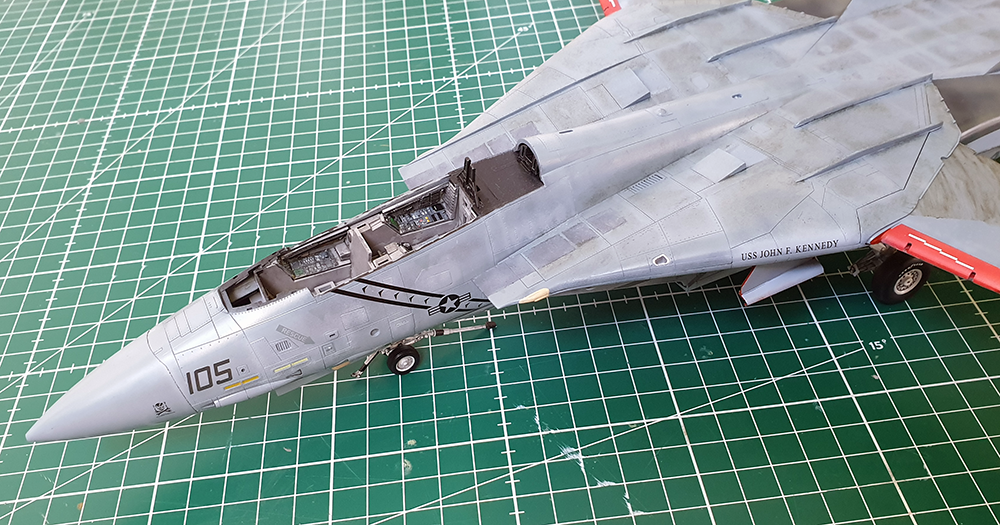
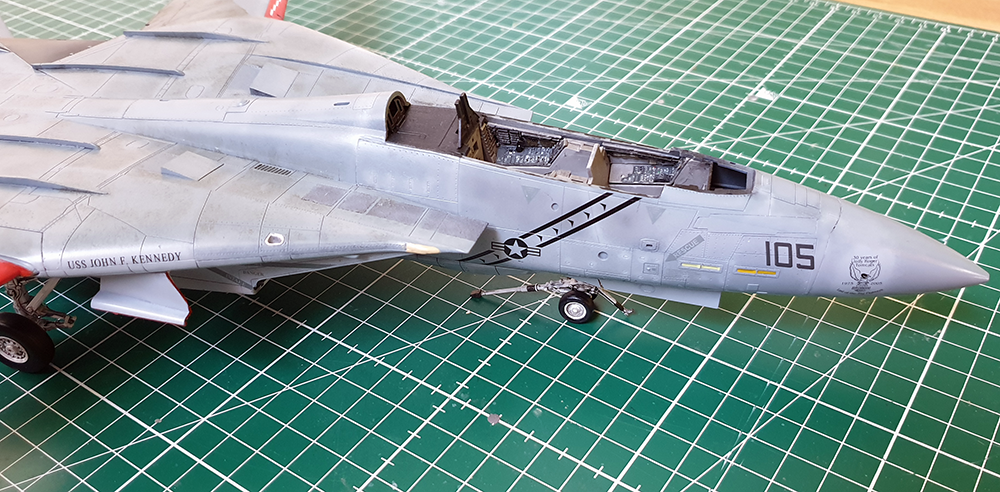
I worked my way up towards the cockpit going lighter (well trying anyway) on the weathering. Then did some corrosion control paint on the panel edges with the base colour.
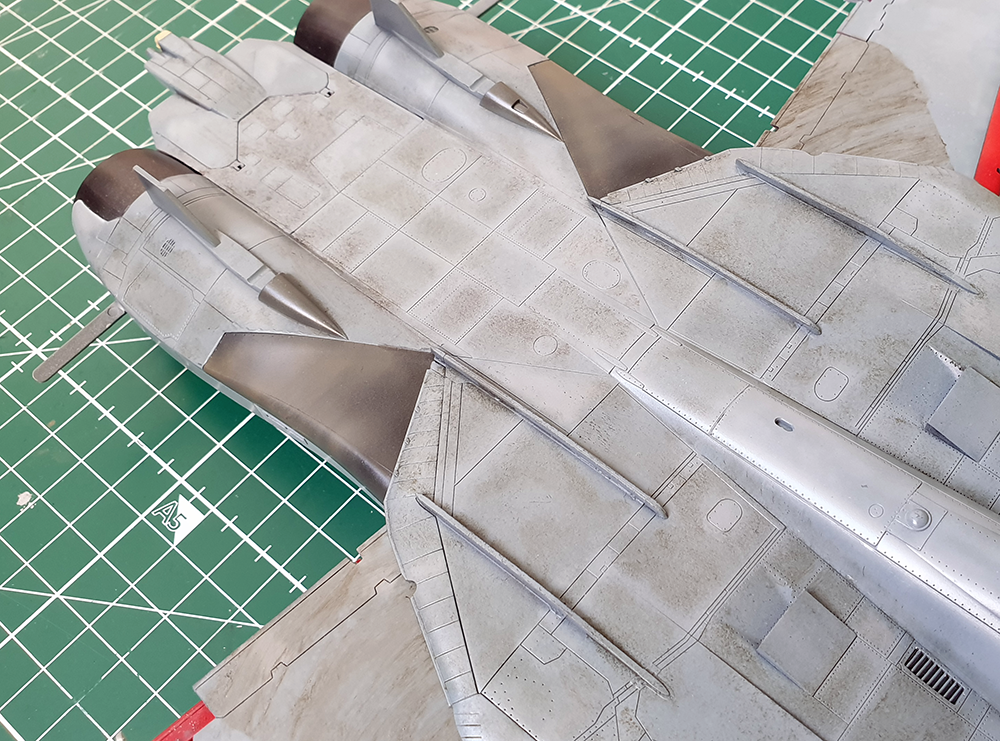
The area behind the cockpit received some over sprays of heavily diluted MRP smoke to darken the area rubbed by the flight crew clothing when entering and exiting their office.
Lighter shades were painted where the Grumman ironworks logo will be applied. Invisible from the picture but the wing glove for the name of the carrier received the same treatment:
Almost finished with weathering the top of the TPS scheme:
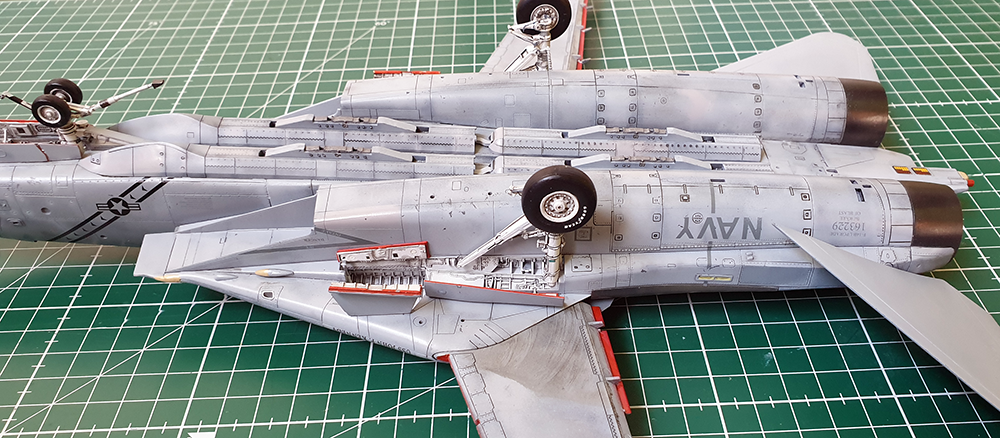
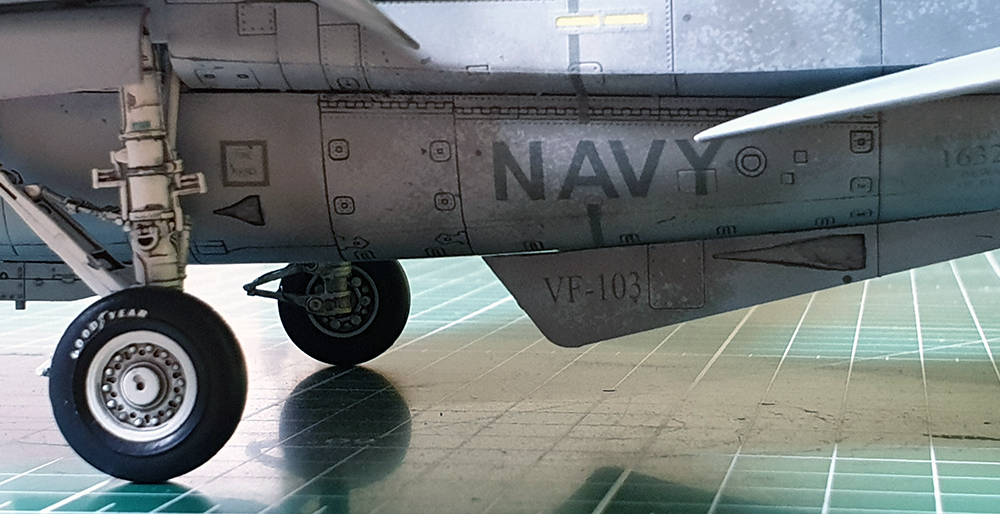
Details where then added to the underside: landing gear and doors, phoenix pallets. Decals were also applied after a coat of MRP SuperClear.
The AMK gears are gorgeous and except braking lines on the braces of the MLG there’s hardly something missing.
The nose gear with the kneeling option was too good to pass and as I said earlier I made sure the stance was respected – I probably went a little overboard but I really wanted to have the kneeling stance very visible.
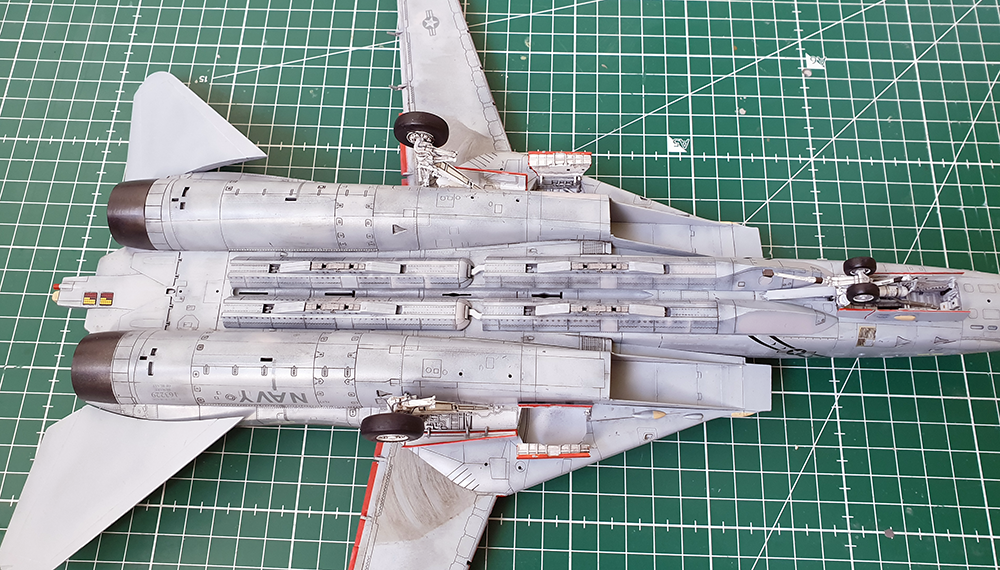

The main tyres are not the final ones but still the Tamiya early ones. These will be replaced with AMK later tyres. (see below picture taken from later stage of the build).
Decals are gorgeous as well and they went on the model without a glitch. carrier film is almost invisible on the MRP SuperClear coat. The only part where I had a bit of trouble with sizing issue was the wing formation lights. But the AMK decals are way too yellow to my liking, so I had to adjust the size of the aftermarket decals.
Stencils are barely visible, but that’s exactly how I wanted them. Decals have been sealed with an extra coat of MRP Super Gloss and I’ll now wash some area and weather the wings and stab some more as well as address some required touch ups here and there.
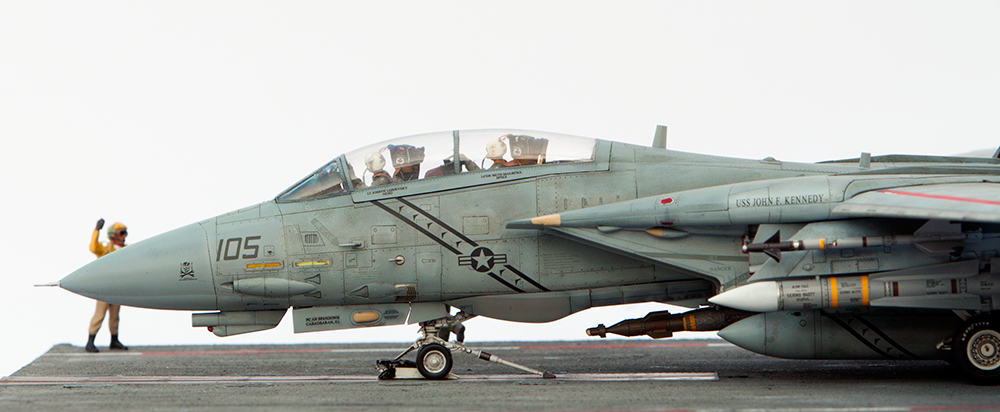
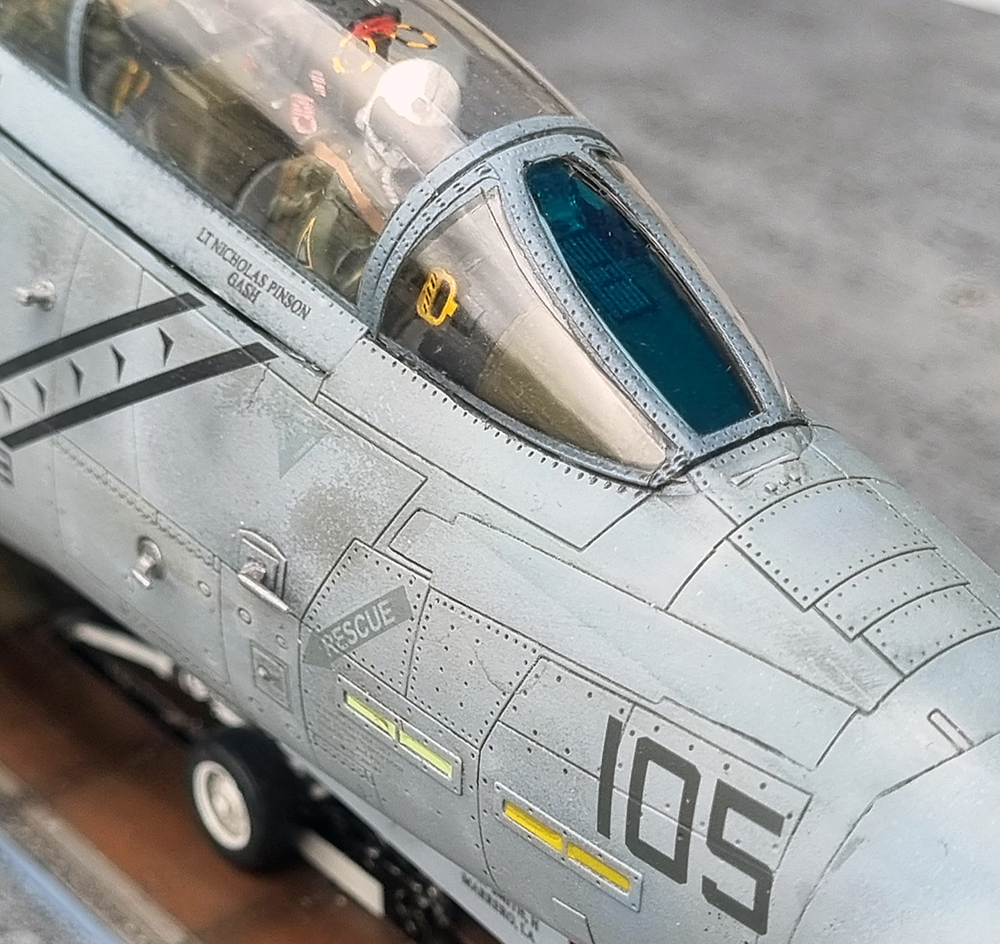
The cockpit was finalized by gluing the pilot and their GRU resin seats ensuring that the canopy would close correctly.
Notice the large yellow handles for canopy release, these are dearly missing from the Tamiya cockpit. A detail very visible.
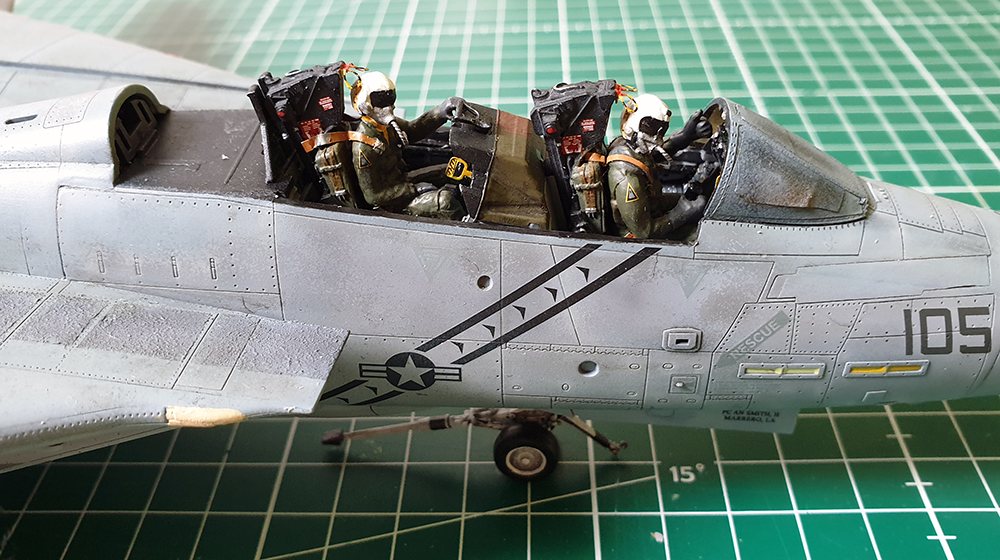
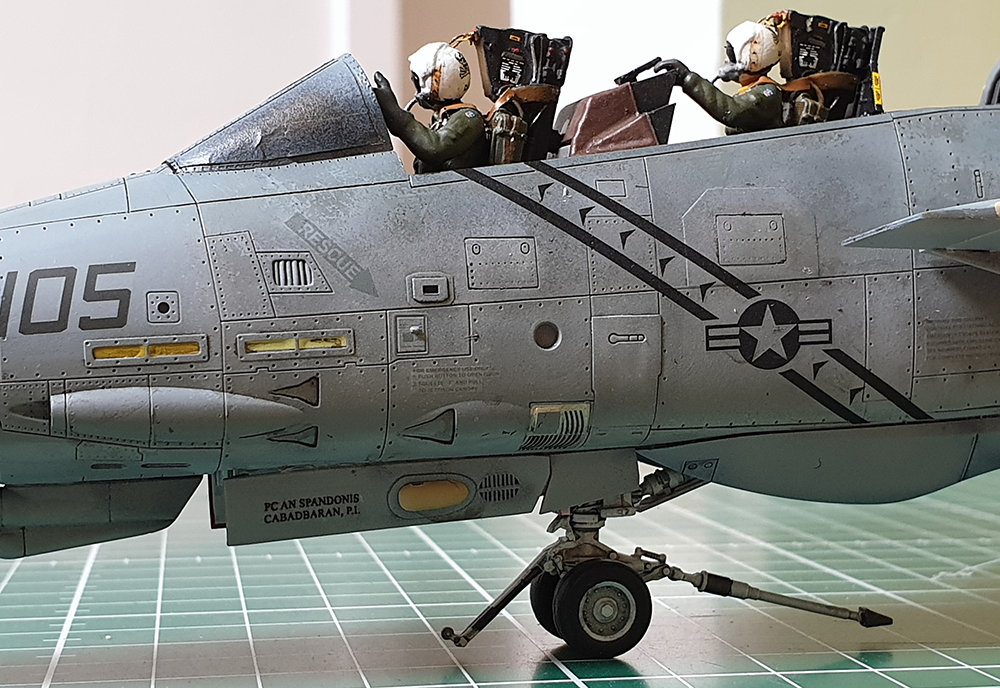
Further weathering was done under the cockpit on the fuselage sides and at the rear of the engine bays. Note the different yellow on the low light formation lights. Well done Fighter Town.
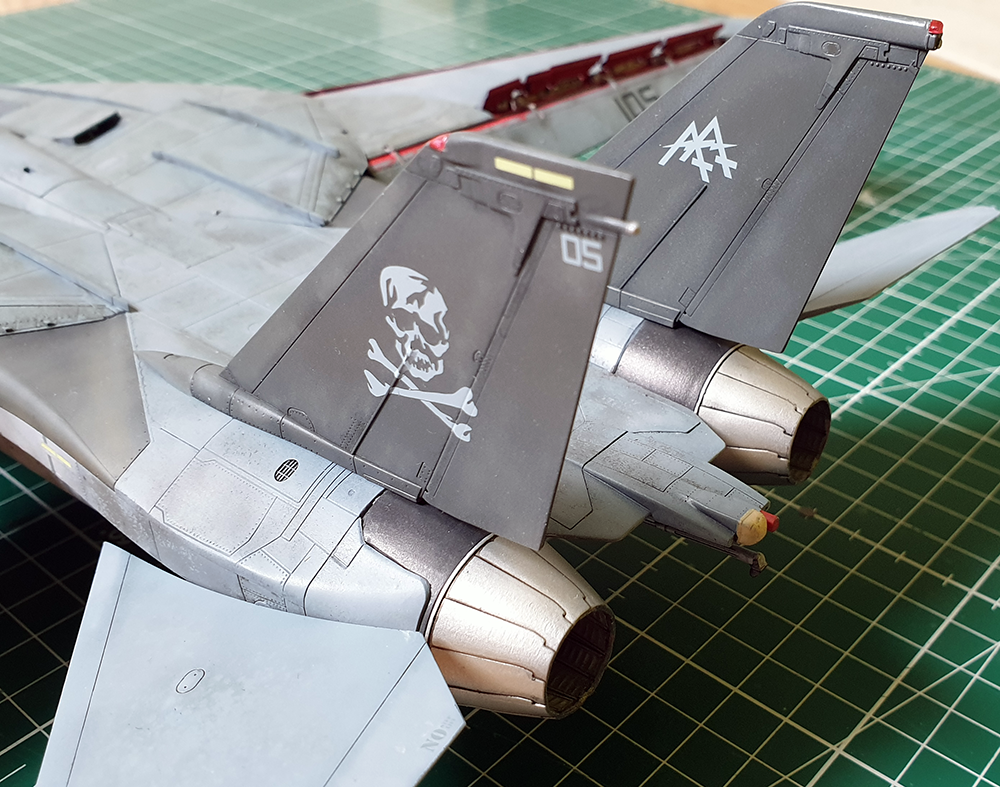
The vertical tails and engine nozzles are glued in place. I chose the closed nozzle for a military power setting.
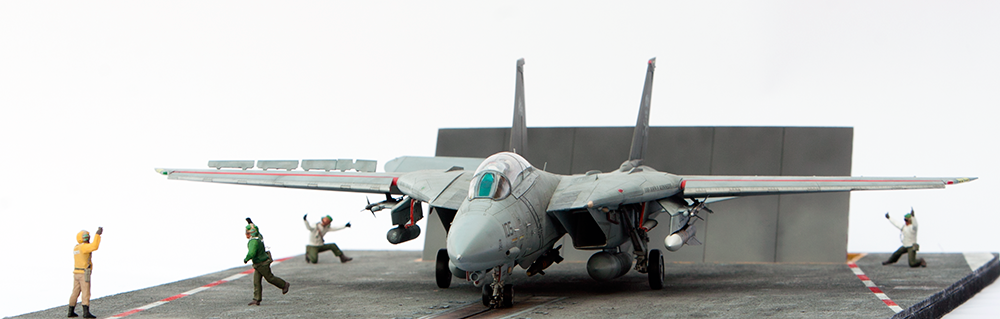
The stabs are asymmetrical as the pilot checks the flight controls just prior to being launched.
The canopy was closed and the model received the usual final semi-gloss varnish protection coat before the canopy masks were removed.
I was surprised to notice that the green tint decal I applied inside the windscreen was actually completely opaque and the result was not as good as the same decal I applied to the Tamiya model.
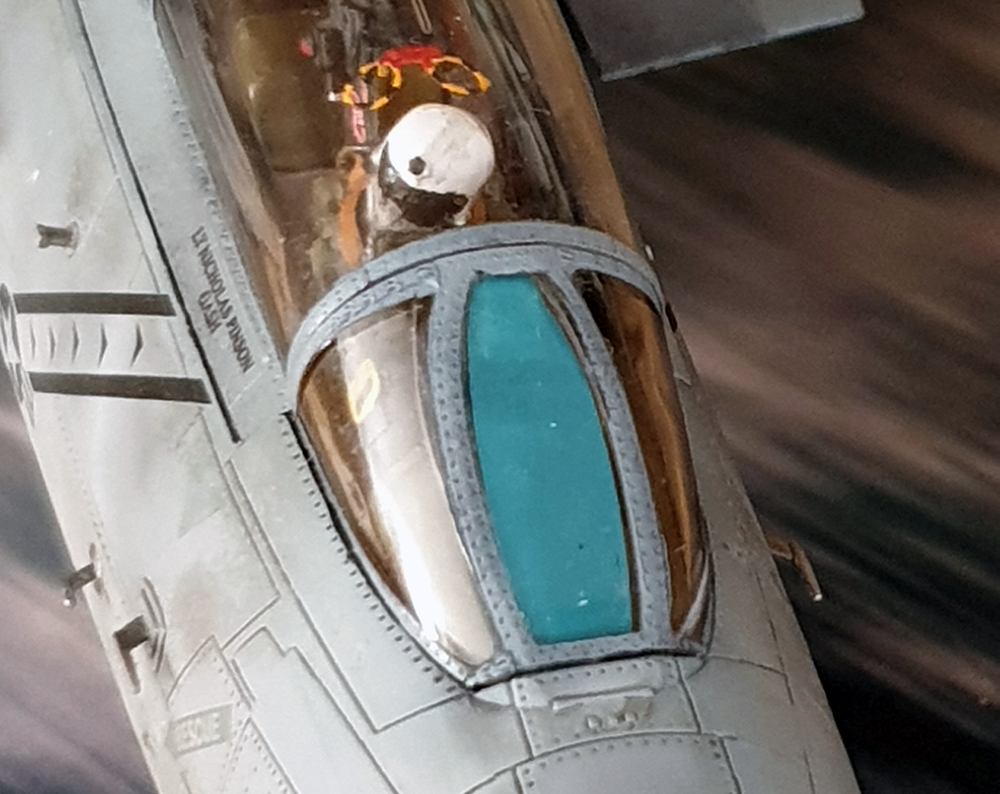
Brian, from FighterTown decal told me that the sheet was misprinted and I should have used the decals on the small insert (I could have figured all that by myself).
The windscreen was popped out with an x-acto blade (lucky I used only a tiny bit of white glue to secure it in place). The decal was soaked with MicroSET and came off very easily. After a quick wash with clear water I applied the same decal from the insert and the result was much better.
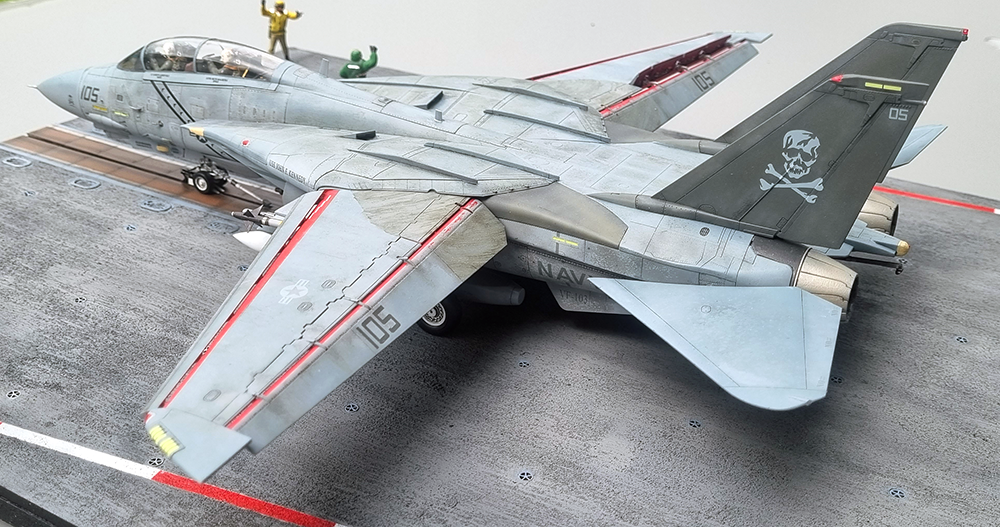
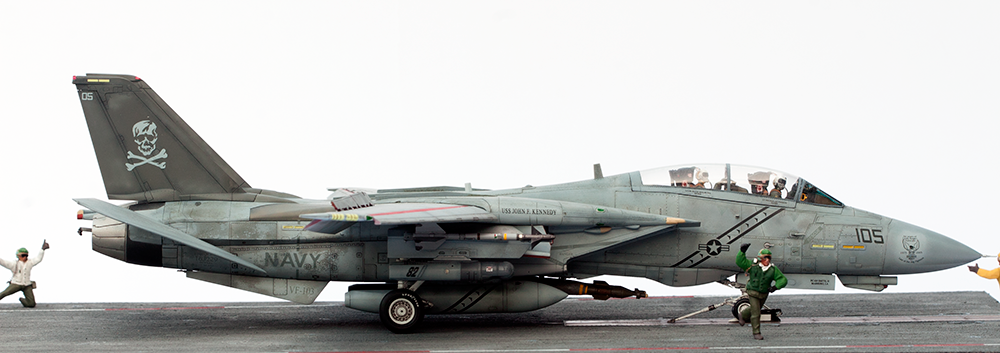
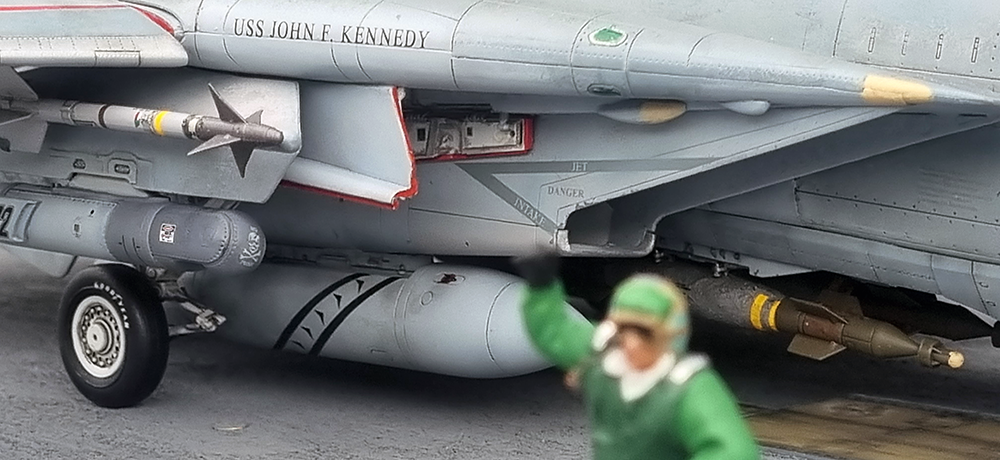
The model was then armed with 2 Sidewinder, the Lantirn pod and the counter balancing Phoenix as well as two GBU-12 on the forward pallets. and the fuel bags decorated with the Jolly Rogers chevrons.
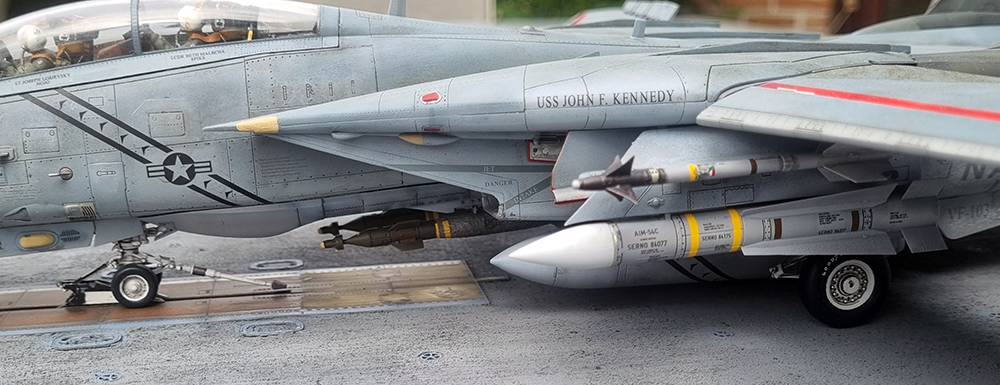
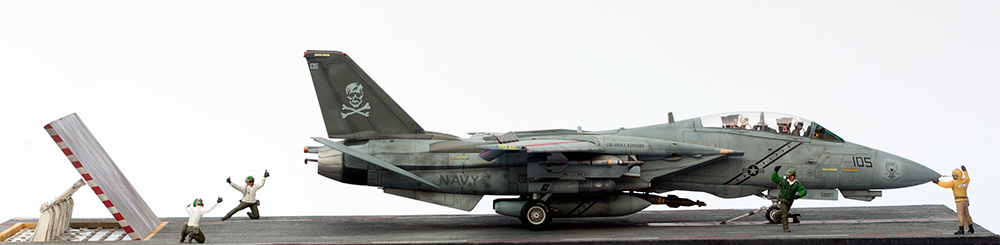
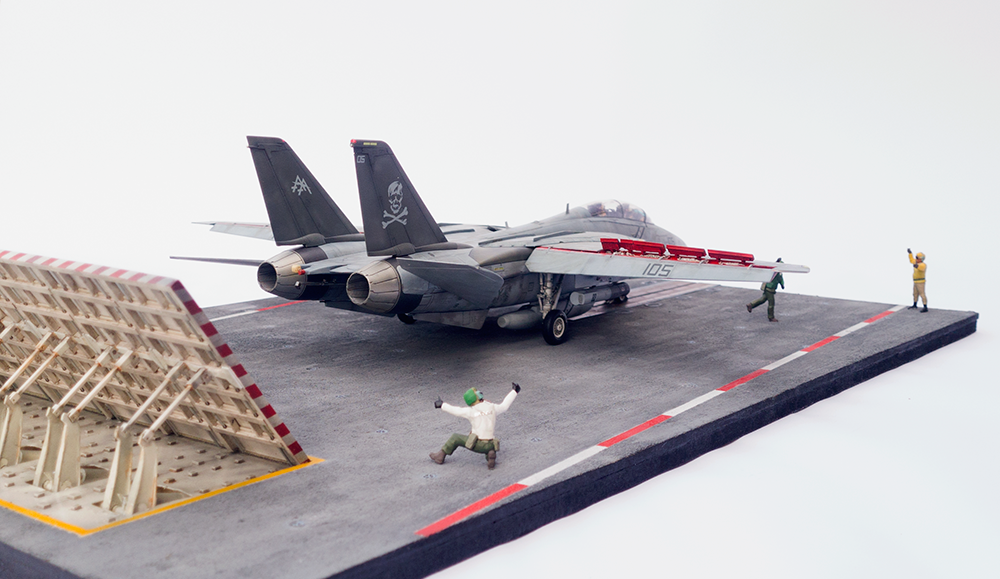
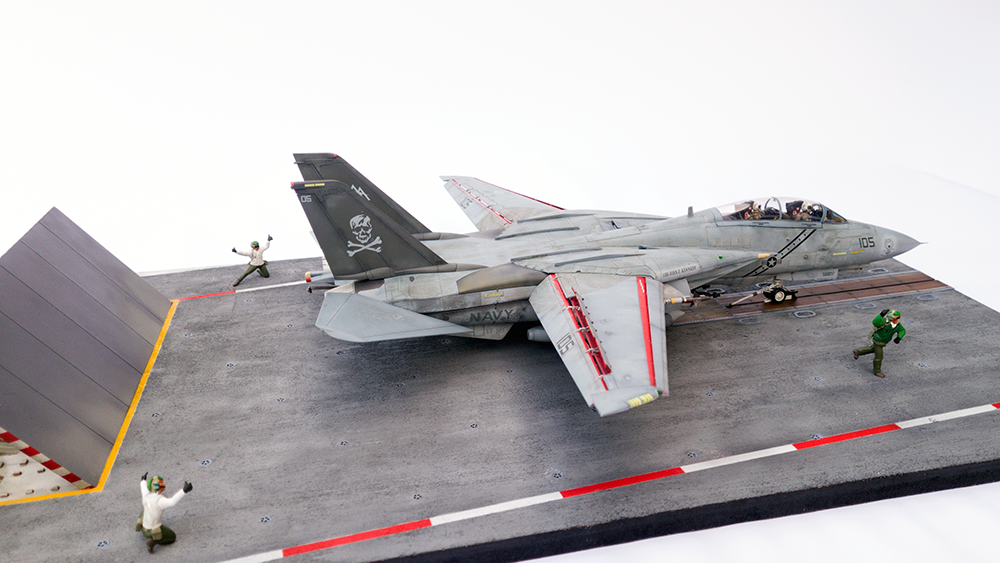
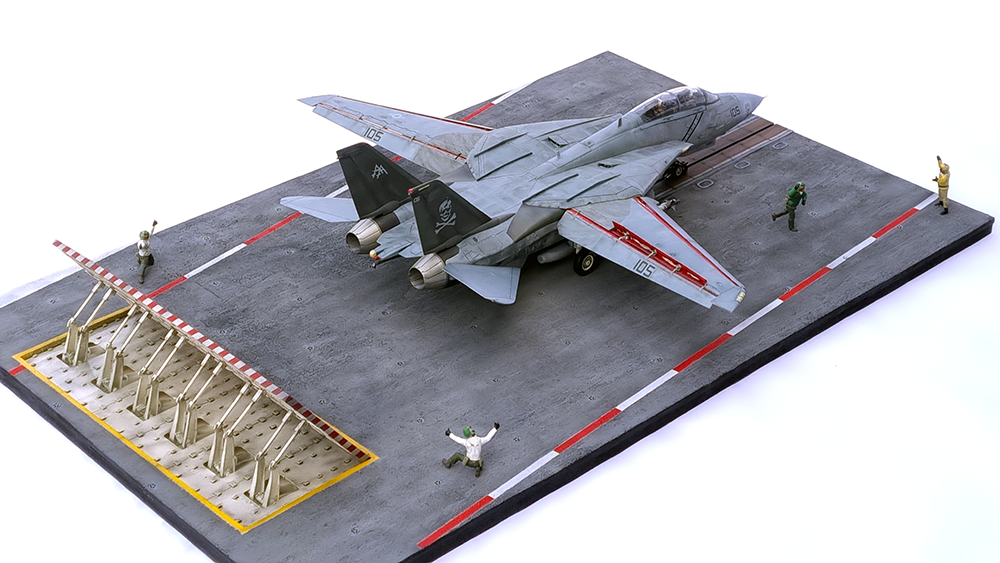
The finished model had to wait for a while until my carrier deck diorama was finished.