
GBU-49 are hard to come by in 1/32 and I need a few for different projects such as the future Mirage 2000D and the current KFIR block 60.
The only GBU-49 I heard about in 1/32 were the from CMK (since then I learned that L’Arsenal offers a GBU-49 for the Mirage 2000 but I haven’t seen it in the flesh). The CMK GBU looks more like a GBU-49 than a GBU-12 Unfortunately it is not a correct GBU-49 either.
CMK #5093 GBU-12 Review:

Reference #5093 provides 2 bombs in resin, the 8 forward fins and the 2 laser heads. A decal sheet and a PE sheet for RBF flags.
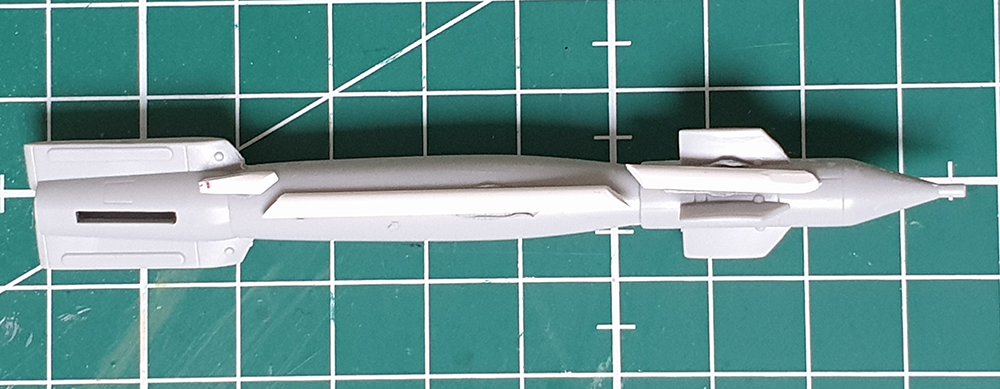
The resin is nice and details are crisp. Size wise it is very close to the usual injection GBU-12. The nose unit seems to be a bit smaller in diameter and the bomb body shape is better marked.

The GBU comes in one piece and a single saw cut is required to remove the resin block. The forward fins must be assembled as well as the laser head.
Locating holes really ease up the forward fin assembly process. The laser sensor must be cut from it’s block, drilled 1mm to be inserted into the bomb nose pin. This mini review would finish here but some details on the resin are intriguing.
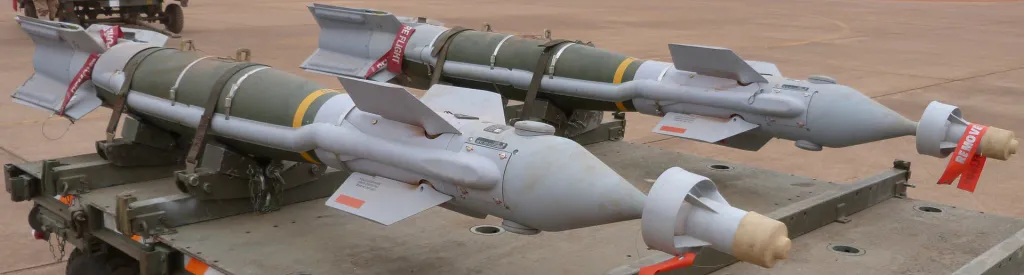
The GBU-12 is a Paveway II series and is a general purpose bomb fitted with a laser nose kit and a guidance tail kit, nothing else.
But this so called GBU-12 from CMK features GPS antenna and a wire tube from the nose to the tail typical of the GBU-49 which are combined GPS/laser precision munitions. This GPS kit is attached to the bomb with metallic collars also featured on the resin reproduction.

So this is actually not another GBU-12 bomb but a more rare GBU-49 in 1/32?
One could say that. Unfortunately some problem are preventing this to be a correct GBU-49 reproduction.
First the 2 GPS dome on the nose are mounted on the sides and the real GBU-49 has them installed top and bottom when the bomb is loaded.
Secondly the wire tubing connecting the nose and the tail seems undersized to my eyes and of square section. On real weapon this clearly is half round and wider.
That said, it’s pretty close to either laser guided bomb. To make a GBU-12 out of it, simply remove the GPS dome and the side tubing (although I would not do it and get a straight GBU-12 in the first place)
To make a GBU-49 I’d say that the only requirement is to move the 2 GPS dome on the nose by 90°. The tubing might be undersized but that should be good enough to provide a decent enough GBU-49 with minimum work.
Considering these are not widely available, it is not a bad option.
If neither option suits you, then you may do your own.
Which is what I’ll document here below.
Converting a GBU-12 to a GBU-49 on your own:
First you need to find a suitable donor. There are many kits using GBU-12 in their weapon options. The best suitables I had at my disposal was the F-16 Sufa kit (4) or the F/A-18E from Trumpeter (6)
I find the Academy better, but the Trumpeter are not as bad as their weapon can sometimes be, my only gripe so far is the thickness of the front fins.
I will convert 2 GBU-12 (one from Trumpeter, one from Academy) in two different manners both based on real life pictures.
Material wise you will need profiles in plastic of 2 mm half round, a punch and die set and aluminium tape.
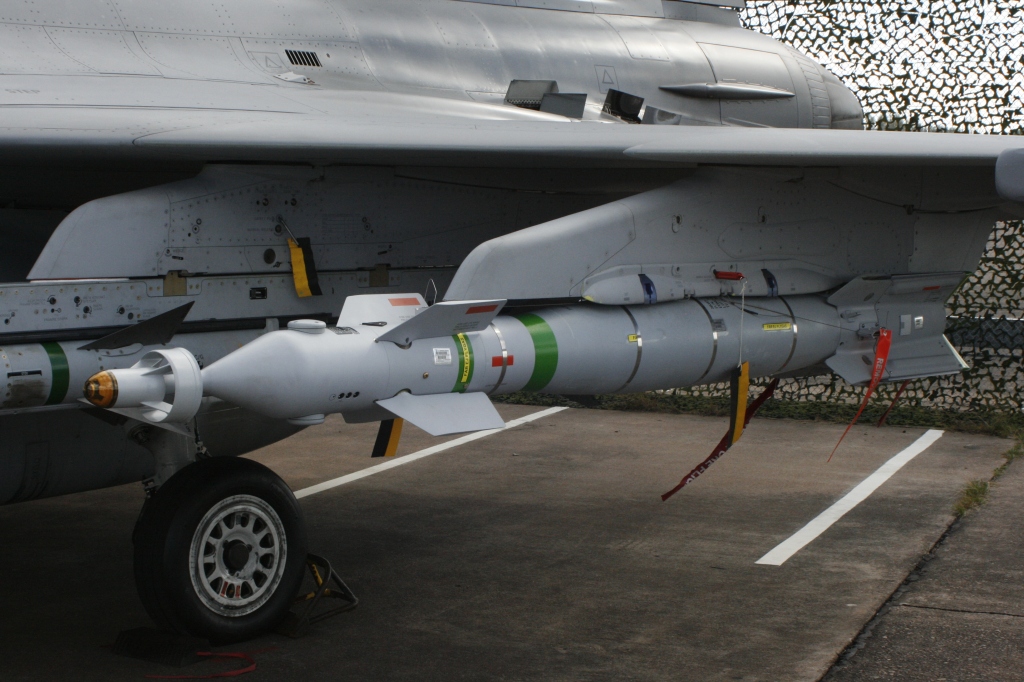
The main difference in the two ways to convert the weapon will be how to place the side tubing. On the following picture (Rafale) you can clearly see that the tubing is not straight but bent down on the side of the bomb body.
This will be attempted on the Trumpeter GBU-12.

On the next picture (from a Swedish Gripen) you can see that the side tubing seems to be straight. This will be done on the Academy GBU-12.

The bent option:
Obviously this option will be harder to do since you will need to cut at an angle different sections of half round profile.
I started with the nose. The forward tip was rounded and the top sanded a bit flat. It should be positioned just forward of the fin, at the same level as where the GPS dome will be placed. The rear end was cut at 45° and ended at the bomb body. This strip is glued to the right side of the nose unit when the bomb has the pylon attachments on top).
A length of half round profile with both ends cut at 45° (45° and -45° actually) was then glued on the right side of the bomb body a bit lower than the head profile. This profile should follow the bomb shape precisely.

Finally a rear profile was attached on the back of the bomb body, connecting to the tail at the same level as the nose profile, hence higher than the longer side strip. The forward tip was cut at 45° and the top of the rear tip was sanded downward to shape. before being glued on a piece of aluminium foil connecting the bomb body to the tail unit.
Once all strips are in place, they must be connected with small bits of half round profile. This is the difficult part of the conversion as I always end mixing my angle cuts.
This is where a miter cutter comes in handy, but I don’t own one so I had to struggle with my imprecisions.
I consoled myself with the fact that Putty and sanding will be required anyway due to the different angles of the round profiles so I filled any gap from unperfect angles with putty.

The straight option:
The Academy option is much easier and much faster. Cut the 2 mm half round profile to length (on the academy GBU-12 it is about 60mm, but I would advise to measure and reference your documentation to find the exact dimension according to the weapon model you use).
Round it’s forward tip and sand the top flat a bit.
Sand the back end to shape (top of the rear angled down).
Glue to the right side of the bomb, starting at the nose same position as above, and then the body making sure you follow the bomb shape correctly and finally the rear.
As there is no angle and no connection to be done, the process is much easier.

Finishing both options:
In both case the end shape was made with aluminium foil from the right side of the bomb to the top side where a small connecting part is made for the pylon (I would guess that this is through there that the GPS data are sent to the weapon before release.)

The GPS domes are punched from 1 mm plasticard and glued top and bottom of the nose section of both bombs. 4 rivet holes are punched cardinally with a needle.

As you can see from the above picture, the right most CMK resin has the GPS dome on the side where the two left ones have it correctly placed on top and bottom. Also of note is the size difference of the tubing.
The GPS kit is retained on the weapon with 4 metallic collars simply done with fine strips of aluminium foil. I would advise to paint first the bomb before placing them as they do not need to be painted.
Painting wise, these weapons are differently coloured depending on the air forces using them. Some are olive drab, some are blue and as can be seen from the Gripen picture below, they can be all grey with green lines as well (No idea what green means in Sweden: live or inert?)
The Colombian one I need for the KFIR also has grey nose and tail unit but the bomb body is completely blue signalling a training rounds.
The French ones I need for the Mirage 2000 are painted olive drab with a grey nose and tail and blue bands (inert).


I used Gunze H308 + white (a mix I always use for Air to air missiles) for the grey, H304 for the olive drab and Vallejo 70966 for the training blue. It’s not meant to be airbrushed and a lot of thinner and retardant must be used to be able to spray this paint. The colour is just perfect to my eyes and I never found any equivalent in any other brand.
Conclusions
You see the two ways in the pictures above. IMHO the bent option is better looking but as seen on the Swedish bombs the straight option is perfectly valid as well. So in the end you can chose how complicated you want them to be:
Easy: get the CMK bombs and move both GPS dome 90°off.
Minimum work: straight converting option as seen on the green weapon above.
Maximum effect: bent converting option as seen on the blue weapon above.
Do not hesitate to let me know which one you prefer.
