
This aircraft has an interesting story and is now flying in Belgium. I have been asked to build it for the owner and pilot.
The gentleman already owns a T-28 and a Sea Fury.
I already build a 1/32 Sea Fury (OO-ISS) for him a long while ago and the T-28 (1/48), before it was released in 1/32.
Aircraft history
SL 721 was built late in the war and I don’t think it really saw any war action. It was apparently directly sent into storage at 6th Maintenance unit RAF before being assigned to Air Vice Marshal Sir James M. Robb in 1946-1949.
Back then the aircraft was painted (light) blue and sported the initials of its pilot: JMR
 Copyright © JerryBilling.com
It flew in this livery till 1951 in England. It was then sold to different private owners but was never restored to flying status until the early 1970s in the US. She flew at Oshkosh in a camouflaged version of JMR.
She remained in North America till the late seventies and then sent back to England
 Copyright © JerryBilling.com
In England she kept her green/brown camouflage and was re-coded D*A (for the initials of his owner again)
 Copyright © Vintage Wings of Canada
She was again sent to the North American continent in the late seventies and again coded according to the initials of its owner WK*W but repainted with a better matching green/grey camouflage
 Copyright © Vintage Wings of Canada
in the late nineties, she was rebuilt and painted in the light blue colour, sporting the JMR codes again.
 Copyright © JerryBilling.com
From 2000 the aircraft was flown to Canada and repainted in honour of a Canadian pilot (Flight Lt. William Harper of Niagara Falls, Ontario) of 421sqn Royal Canadian Air Force camouflage as AU*J. Canada registered C-GVZB

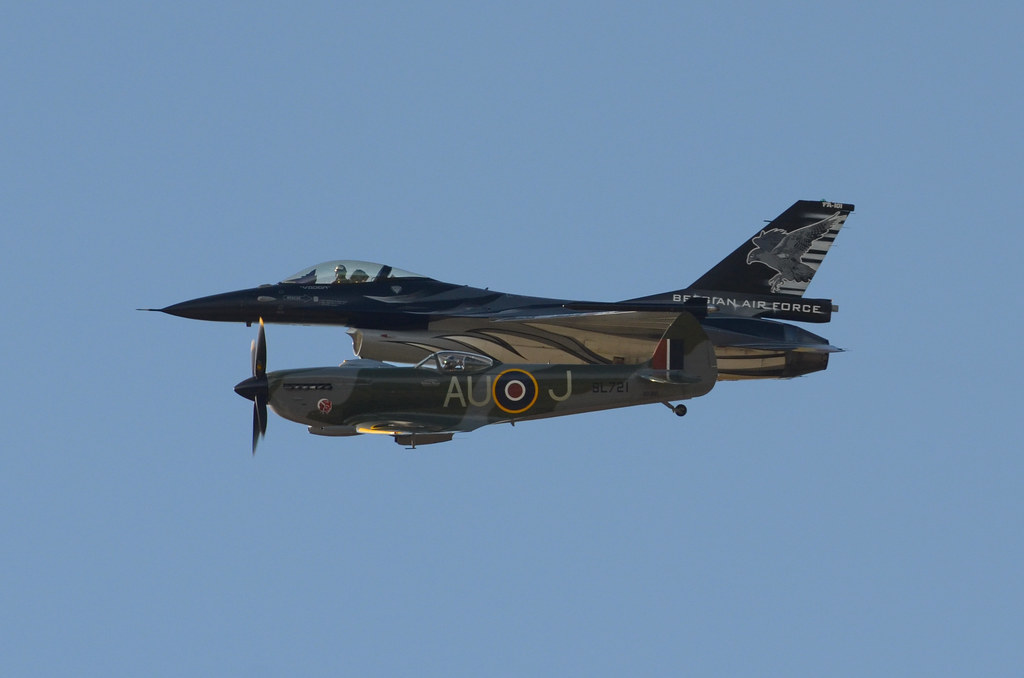
Apparently the AU*J flown during the war wasn’t SL721 but TB886, so I guess they took a little bit of artistic licence there. The notorious giveaway is that SL721 always had rounded wings (including when it flew with Air Vice Marshal Sir James M. Robb) whereas the war horse AU-J had clipped wings as seen in the picture below ")

During his career the real warhorse AU-J flown by Flt Lt W Harper often landed at Ursel, Belgium for refuelling while chasing V-1 in and out of England – making a time/space connection with the warbird coded AU-J now flying around if not at Ursel from time to time. After the war TB886 was sold to Greece.
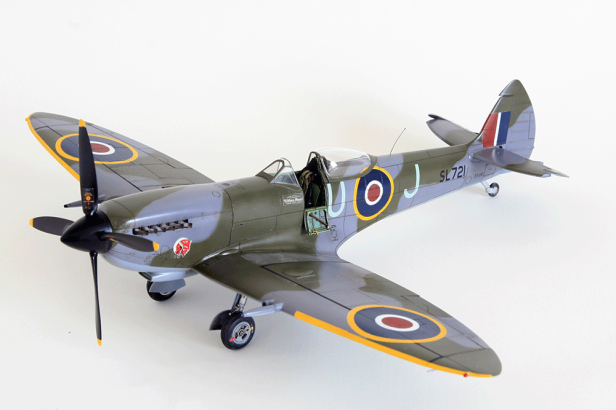
Recently; SL721 was sold to a Belgian pilot and received the OO-XVI registration but kept the AU*J codes. She’s been flying the European Airshow the last couple years.
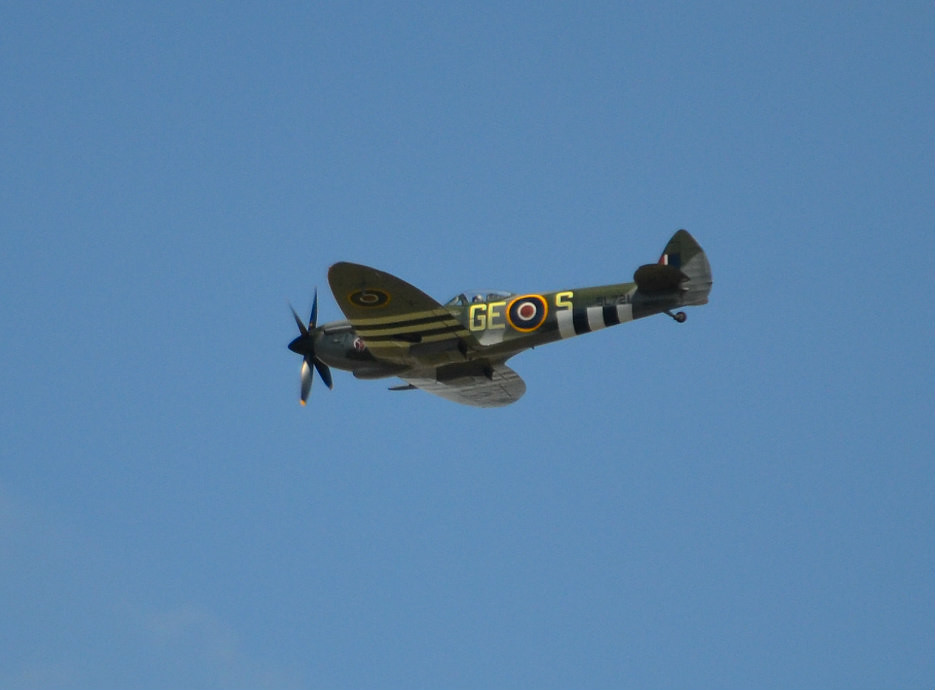
Although she was temporarily repainted for the Normandy landing anniversary as GE*S with invasion stripes of 349th RAF Belgian squadron, she will remain as AU*J in the future and that is how this model will be built.
So it is not really the aircraft of William Harper of 421 sqn. But this build will be as proudly marked on the real spitfire fuselage:

http://www.jerrybilling.ca/Jerry Billing Spitfire’s/History of Spitfire SL721.htm
The kit:

The Tamiya kit will be built almost OOB, the only addition I really needed was the 3 spoke wheels because not included in the kit and since the AU-J is not commercially available as decals or masks, I called DN models to the rescue and they made me custom masks.
Many thanks to Mitko and his wife who have been very helpful and efficient for this project.
The only addition I could have passed was the new IP from yahu models, you’ll see why I decided to get it late in the WIP.
This Tamiya kit is by far the greatest kit I ever built. I’m actually using this kit as a benchmark for my ongoing 1/24 MkVb to MkIX conversion, trusting Tamiya for accuracy whenever I have a question or a measurement I can’t get easily for the 1/24th build.
But as I was building this I realised how great it is. No putty required, well researched, well documented, perfectly designed. The fact that you can build the engine and have all the panels around it fitting almost perfectly while being removable is really something worth mentioning. Granted the force of the magnets are a bit weak but what a show from Tamiya !!
Unfortunately I won’t use the feature and I will glue the engine covers in place.
The build started with the engine. As I won’t display it I won’t spent a lot of time extra detailing it.
The whole thing was assembled and painted black with mr Surfacer 1500 before getting a very light drybrush with silver.

The frame is painted separately with MRP-111 RAF interior green and minimally detailed.


Even with the plethora of details, it is insane to see all these bits connecting perfectly one to another as the engine is placed in its supporting frame.
What a pleasure to build.
The next logical assembly was the cockpit and it is equally fun to build.
There was just one thing that I didn’t get: the instruction calls for using decals behind the transparent part for the gauges, but the decals were just a black round shape and I couldn’t see the white or cream bezels engraving. In the end I just ended up with a black IP
So here comes the Yahu Ip and although not a fan of pre-painted stuff , this is simply too amazing to pass. I would never be able to get such a stunning result. So off with my pride and in comes the Yahu IP.

Initial mating of the PE IP to the Tamiya parts

The different cockpit assembly before very minor detailing.
Progress on the left and right side of the cockpit


the seat of SL 721 is painted black,

The visor will not be assembled and replaced by a portable GPS unit much later in the build.

SL721 probably never had the heavy Hispano guns installed. what is certain is that the aircraft does not have the narrow blisters on top of the wing.
So they needed to be removed from the Tamiya parts.
After careful analysis, removing the blister from the Tamiya parts would be harder than simply cutting new parts out of plasticard. This was quickly done with Matching plasticard thickness.


Doing so I noticed my matching panel lines was drawn at a weird angle. So I checked the Tamiya part again and noticed the same weird angle (see middle picture)
Tamiya made a very slight mistake here, the panel line shouldn’t be oblique but straight and should not meet the lower wing panel line at the same level, but should be offset to the side as obviously displayed from this blueprint:

Also of note is that the blueprints show the blister on the inner side and aligned on top, whereas Tamiya has them on the outer side aligned at the bottom…
I initially planned to lower the flaps as it’s possible straight from the box. Problem is that there are many mould marks inside the flaps which are not easy to fill and sand.
Furthermore, a little bit of research told me that flaps were quickly raised after landing because they were prone to be damaged from flying ground bits and kind of blocked these two big radiators probably increasing the chances of overheat as the aircraft is taxied. So that idea was abandoned and the flaps were glued in their raised position.
The model is ready for paint and was primed with Mr Surfacer:
There has always been a debate about RAF WWII aircraft soft or hard edge camouflage demarcation, so I analysed pictures of this restored aircraft and I came to the conclusion that the paint demarcation between the ocean grey and the dark green has soft edges but very crisp and the medium sea grey under surfaces are all hard edged.
I first sprayed the dark grey:
And then the dark green and the light grey for the under surfaces:
Usually I trust MRP with closed eyes but that dark grey seems a bit too dark and that green seems a bit too khaki for my project.
It’s certainly because I’m doing a restored aircraft which might not have benefited from real colour batch from WWII.
So I went to see the real aircraft based at a nearby FBO – it’s always great to find specific goals to go flying on a nice Sunday afternoon) and compared colours:
Here’s a picture of the real SL721:
and the colours of the model:
Obviously the light conditions are not the same, so there’s room for tolerances.
Yet I feel my paint is too khaki for the green and too dark for the grey
Here’s a striking comparison when I sample the colours on my computer. Again, I’m pretty aware it depends on the light conditions and the place where I sample the colours.
Yet my eyes are telling me the colours are way off…

Let’s face it, Sl721 has probably been repainted in England, the US and Canada.
So chances are that the colours are far from WWII standard.
Still what I’m used to seeing on Spitfire models don’t quite match what I see after having used the MRP colours, especially the ocean grey. Not saying MRP are thus wrong, I may have a bad impression as well. I guess the important trick is to trust your eyes against paint reference numbers, whenever you can.
So I made a few rough test on a 1/24 Trumpeter Spitfire fuselage:
I first painted half of it with the Tamiya references: AS-32 & AS30 or XF-81 & XF82:
Then painted the other half with what I am used to (made a lot of 1/48 spits with these colours) Gunze H75/H73:
And when I compare these tests with the painted spitfire with MRP 110&115:

My conclusion is:
The MRP ocean grey is too dark to me, that confirms my initial feeling.
IMHO it needs lightening. It’s close to the Tamiya XF-82, both tend towards the blue (which is probably right for a WWII Spitfire. The MRP is still darker than the Tamiya.
The Gunze is way lighter (and that’s the one better Matching what I see on the restored warbird)
The MRP green is not that bad. My initial impression about it being too khaki was probably wrong. It’s very close to the Gunze H73, although a bit darker as well.
The Tamiya XF-81 is a bit too yellow, IMHO.
So I finally repainted it completely and went with the proven route of Gunze H73 & H75.
Once camouflage was replaced, the roundels could finally be painted.
To do that I will use Custom masks from DN models. The roundels of SL721 are not standard as the top wing’s roundels are larger than usual and the bottom wing roundels have the yellow border which normally occurs only on dark surfaces.
So decals couldn’t be used anyway.
Painting roundels are time consuming and whichever method you use you will always need to remove and replace masks. The trick is to stay centred at all costs.
For the colour of the roundels I used:
White, marking yellow (MRP) red is a mix of XF7 and XF68 (3/4 + 1/4) and the blue is H322 (blue angel blue) + a drop of black XF-1.
All colours where checked against the Tamiya decals and saved for later use.
First step is to paint a white layer. (It may not be necessary but old habits die hard and I always prime light colours with white)

As you can see, masks have been marked with diagonals to ease up the aligning process later on. The internal masks have been replaced all together on the white, then the yellow outline and red centre masks have been removed and painted respectfully in their colour:
The next step was a bit tedious as the mask for the yellow was a real pain to replace correctly. Once satisfied, I removed the large centre mask and painted the blue:
The AU J code masks were then placed. As with the roundels, I feel it’s safer to stick all the masks together using strips of tape and then only remove the letter with a new sharp X-acto blade. That will ensure that the inner mask for the A will remain perfectly centred. Of course, there’s no way to do that with the J in this case.

Some more tape for overspray protection and the codes where painted in MRP sky:
Next up are the SL721 and OO-XVI registration. That’s probably the smallest masks I ever painted. These letters are very tiny but in the end came out great – Kudos do DN models work! Spraying black I also painted the walkway lines on top of the wings.
It took me the full week and Week-end to get to this point, but the end is near for this “quick” build.
I’m glad for the help of DN models and the custom work they are able to do, it saved me a lot of time and trouble.
The only tiny details that I miss are the Indian head and the tribute to the pilot and the Prop markings that are not corresponding to the decals in the Tamiya box.
So I quickly made a tiny decal artwork that I printed on white inkjet decal paper:
I made two background colour to account for the print/paint difference, normally one of them should match at least
To get the right colour on the decal artwork, I painted a bit of plasticard and scanned it to get the closest hex value which then was used for the background colour of the decal artwork.
Using transparent decal would not be ideal as the background paint is too dark for the light coloured artwork.
The above artwork was printed on a white inkjet decal paper and a quick coat of MRP super gloss was sprayed to protect them from water.
One of the two green background (right most) was good enough and the decals were applied to the model:
It’s still quite visible with the picture, but quite less in real and I’ll tone it a bit down with touch ups and varnish. (some weathering marks I can’t see with naked eyes need to be cleaned as well (these macro pictures are unforgiving )

The Indian head turned out pretty good. No way this could have been done with transparent decal paper, at least not without a white paint background. Logo prop were satisfactory as well. The white cut line can’t be avoided but a quick touch up will solve that before the usual semigloss clear coat.
I can’t weather this model as it’s kept shiny and immaculate.
So I just gave a very subtle splash of Tamiya brown wash.
For the same reason I also will not spray a semi-gloss coat, I’ll stick to the current gloss.
I did spray matt varnish on the gear and tyres and the exhaust and the walkway area though. The walkways are not painted black but there is a very visible change of brightness when you look at and compare them to the rest of the wing.
I suppose that these area have been sprayed on the real aircraft with a kind of transparent stronger protective coat.
I initially wanted to give them a mist of light brown, but in the end I decided against it and simply gave them a coat or two of matt varnish. The difference is subtle yet remains visible. I also gave them a quick brush with concrete pigments.
The exhaust are the only real parts that needs weathering:
This was done on the black painting with first a splash of streaking rust effect, then concrete pigments at the base of the exhaust and black pigment at the exhaust hole.
The pictures below show the exhaust before application of the pigment fixers which always tends to tone down light coloured pigments:

Final steps were to add the non-standard antennas for a modern Spitfire and gluing the canopy and resin access door in place.
I replaced the access door with a resin offering because the stock Tamiya part was lacking in detail and depth. I think it’s a very visible detail and that was one of the few part from this kit benefitting from a resin replacement. (the others being the wheels because the stock parts didn’t provide the 3 stokes wheels I needed for this model and the Instrument panel). 
The rear view mirror is not fitted but a handle and a ball inside the sliding canopy were added, they are not visible in the above picture.
One last thing worth mentioning: The model instructions offer two ways to display the aircraft: On that great stand for an inflight or on its wheel.
Both options have the auxiliary fuel tanks installed, which is a clever way to install the aircraft on its stand as 2 fuel tanks are provided. One which is screwed to the stand and the other that you can remove from the aircraft when you want to place the model on the stand: 
As you can see from the picture above, there are two holes in the belly of the Spitfire.
If you reinstall the separate fuel tank, the holes are covered by the fuel tank pins.
But if you don’t want to use the fuel tank, the instructions don’t say anything about covering these 2 offending holes. Granted they are not quite visible when the spitfire is on its wheels but knowing Tamiya quest for perfection, I thought no way they would allow that to happen. There must be something planned for these holes !!
And sure enough part 9 of the double sprue where the fuel tanks are attached is meant to cover these holes. It’s just not referenced in the instructions:

they don’t even require glue:
Much better for my model here that obviously doesn’t carry the ferry tank.
Conclusion
As I said, this is probably the best engineered model I ever built. It was a true joy to build this model. It may sound obvious but unfortunately I don’t build much Tamiya models, In anyway the quality of this kit is really astounding!
I replaced the IP because the Yahu model was really better, I replaced the wheels because the 3 spoke wheels were not included and I replaced the side door because the Tamiya was lacking depth. And of course I used custom masks.
But the rest of the kit really doesn’t need any aftermarket, and this is from a guy who usually buy every aftermarket possible for all his kits. So this was really an exception for me.
Here are the final pictures:


