
In the previous part of this build, we left the model completely assembled and ready for paint.
The big challenge of this part will be to mask the geometrical Lego shapes but I called a friend doing vinyl masks and asked him if he would be interested to make this aircraft. After a few weeks a couple of mask sheets were delivered to my home and the adventure could start. 
Let’s start with a layer of MRP white. As it’s a demo airplane and as it was short-lived there is no real need for heavy weathering or pre and post shading: 
Then Yellow. I initially wanted to use the dark chrome yellow from MRP which seemed to match the real model when looking at the bottle. But when I sprayed it was too light so I reverted to H24 from Gunze. The challenge with the yellow is to correctly time it’s fading to the white. With the masks, it won’t be easy to correct any wrongly placed fading
I started applying masks on some easy parts to test their use. The trick is to find one horizontal or vertical line for reference and work from that one. The square on my cutting mat often helped.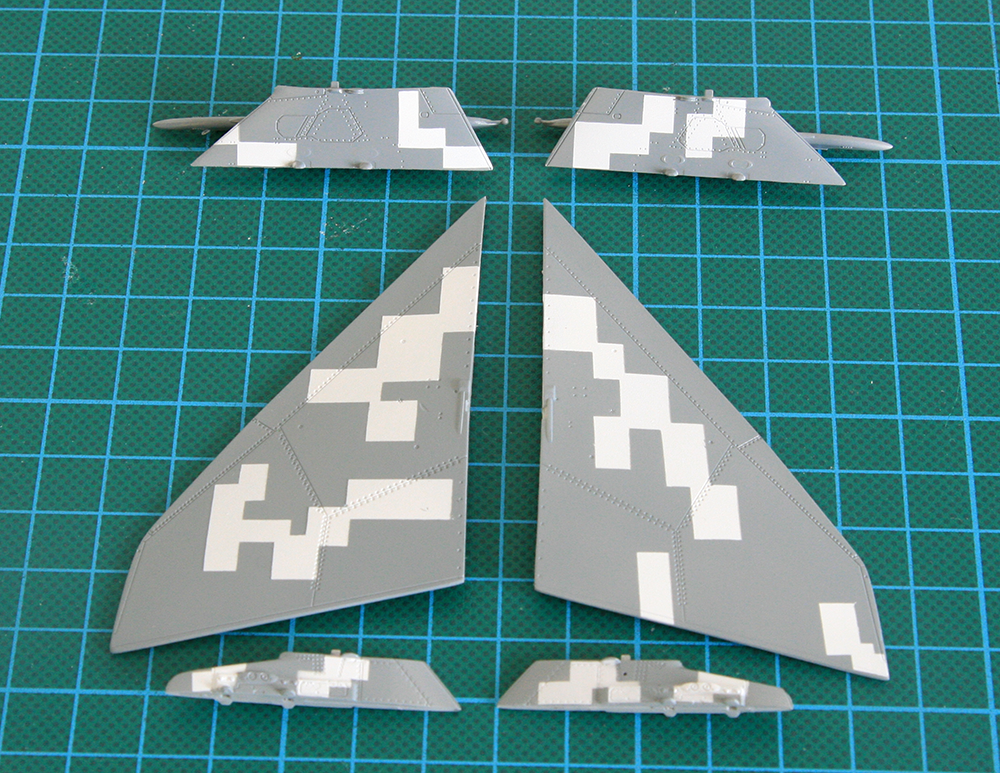
I then sprayed a coat of MRP 105 for FS35237 which is the standard one colour Luftwaffe Tornado:
Satisfied with the result, but not willing to do the full bird in one go, I protected the right side and worked on the left side. slats and spoilers are just placed in their respective positions. Flaps will be masked separately.
Using these masks is really easy, I didn’t have much trouble to stick them at their correct location and from the photo comparing I did they are quite accurate and most importantly well cut and smartly designed. Half the bird is now painted.
Some details shots reveal some minor mismatches, which can be very easily corrected at later stages. On the whole model, I can say it happened at three different places – and most of the time because I placed a mask not at the perfect location.

Painting for the left side was completed shortly after without any issue:
Inner parts like the flaps, the inside of the spoilers and the inside of the slats were painted with the MRP equivalent of H307. It is a lighter grey which incidentally is part of the colours used on the same aircraft before it was painted as the Lego bomber. The BOZ pods are H307 as well but i will lighten them up as i paint the harms with H308.
Gear were assembled separately. Not much work on the kit’s gear leg except adding the braking lines and various lines. The wheels are the gorgeous Brassin’s ones.
They were painted MRP white followed by a light grey filter and a dark wash. The wheels have been painted with H77 and lightly drybrushed.
The front wheel oleo was cut shorter to give the forward pitch moment of the braking on the runway. I Didn’t want to overdo it too much but the pitch down is barely noticeable (i cut about 3mm of the oleo). That will have to do for now. I’ll see at the final stages if it’s enough or if I need to find other ways to pitch it even more down.

The top and bottom wings also received a coat of basalt grey for the part of the wing sliding inside. There is no masks for these weird shape and hardly any instruction at all. So I proceeded according to pictures from the Fox2 book.
And finally all the black panels were painted on the fuselage the tail and the nose. The nose is a trap. the black paint delimiting the nose from the fuselage should not be painted from the line where the plastic nose meets the fuselage. That joint needs to be sanded down completely. The black paint actually starts at the next panel line.
The thrust reversers: Revell’s gem
The deciding factor to make this model initially was the possibility to open the thrust reversers straight from the box. That was a very clever idea from the manufacturer. It is so rare that it needs to be mentioned.
The level of detail is not bad but some PE parts are available on the Eduard sheet to make them even better, so why not use them.
Eduard suggest to add PE parts on the top and bottom thrust reversers. But only the bottom plates are redirecting the airflow, the top reversers are pretty void of any details.
So don’t follow Eduard instructions and study carefully your pictures (It seems there is less and less quality control jobs in the aftermarket industry nowadays, …)

Once assembled the bottom reversers are pretty good and well detailed.
The top reversers (on the right below) were just detailed with archer rivet lines and not with any PE as Eduard suggests.
Eduard also provides details PE parts for the actuators arms for the reversers. The instructions tell you to glue them on part 121 which are the closed reversers. I glued them on 122 which are the open ones. There are 8 PE parts, I couldn’t figure if it was meant to be double-sided or for all 4×122 and 4×121 parts. It’s either 122 or 121 so no need to have both set detailed.
I glued them double-sided but honestly it doesn’t make any difference. One side would have been more than enough.
The next step was painting the exhaust parts in different shades of Alclad.
As usual, i don’t have any rule and I progress by ear. In this case i used magnesium as base colour, a bit of steel and aluminium, exhaust manifold for the tail end and inner exhausts.
For effect I used pale burnt metal and hot metal blue, barely visible in the pictures but it’s visible to the naked eye.
the parts were then assembled and glued on the fuselage, leaving the thrust reversers for the final stage of the build:
Extra ECR bits:
The tornado ECR needs a few bits the IDS boxing doesn’t have. Luckily a fellow modeller from ARC came to the rescue and moulded the LRMTS empty casing and the Carl Zeiss Infrared and he even went the extra mile to make the HARM pylons for me. thanks Dennis, i hope to be able to repay in kind one day. 
I also ordered some Brassins harms off eBay but these were not delivered yet. I have no reason the seller is of bad faith and more suspect a failure of the post system, nevertheless the harms haven’t been delivered to this day…
The final act of the intake relief doors
Plasticards were cut to shape, engraved and painted for the intake relief doors:

Assembling the wings
I was wondering how to proceed to attach the slats to the wings. Revell instructions suggest to glue the hinges and springs to the wing first and then present the slats.
But I decided to proceed with another method which proved quite easy:
1. Glue the hinges to the slats avoiding superglue but slower contact glue
2. Attach the slat to the wing by inserting the hinges into the wing’s holes
3. then insert the springs in their location
The flaps were easier than I thought and went in without much of a problem
Here’s a view with the full wing, slats and flaps deployed for landing and the spoilers out for braking action:
The cockpit & pilots:
I started working on Werner and Hans (PJ phantoms pilots) and their office. I didn’t want Werner to look sideways as he’s landing an airplane, he needs to look straight ahead at the end of the runway. So his neck was cut just a bit and his head forced straight ahead. Hans on the back has nothing to do so he can admire the crowd of spotters on the taxiway line. 

Working with PE seatbelts has never been my strong point, especially colored ones. I most of the time revert to painted lead foil. The seat belts are ready to connect to the pilots. No accurate rigging but the effect will be good enough once the pilot are seated.
Each time something was added in the pit, I always checked that the canopy remained a tight fit. I’ve had too many of these surprises….
After seriously trimming their legs Werner and Hans have been installed in their seat. Werner stay focus on a distant point ahead to keep the aircraft on the runway and Werner is thrown forward due to the reverse Hans just engaged.
The canopy is ready to be closed but not before one last challenge must be mastered: the dreaded det cord…
It’s always been where I usually screw up the transparencies. So I decided to try something different and paint it from the inside. It’s in relief so it should be easy enough. Unfortunately my brush painting isn’t stable enough and screwing it is way too easy, so it’s going to be airbrushed!
Step one, mask the inner canopy and make the line stand out with a pencil. At that point I still wanted to remove the tape and cut it along the drawing on the desk. But then I figured out I’d never be able to have the perfect matching contour.

So I modified step 2: I ran a toothpick along the edges to make them stand more even more, put a new blade in my X-acto knife and lightly cut into the tape following the contour as best as I could, and sweat a bit
Airbrush out, light coat of H308 and remove the masking tape. Too bad I can’t check from the outside, that will have to wait till the model is finished…

Decals:
I needed to design a couple of home-made decals for this build. Mainly the tiger head logo and the web address for the tail. The rest of the decals will be provided by Hahen sheet 48047.

The tiger head is yellow and from past experience I know that home printed light colours are too transparent, so It needs a white background. This was painted on the tail using masks:
The artwork was then printed on a regular home printer with inkjet transparent decal paper, then protected with a coat of gloss (which I always tend to overdo).
Then applied on the model with just a drop of Microsol. The Hahen decals are very fine but you have to cut them as close as possible to the artwork, unlike the industrial decals.
That’s the same when I do custom homemade decals anyway, so i didn’t see the problem.
But I had some issues with the edge of the decal film not sticking correctly to the model.
To be fair, I often have that with my homemade decals too. And I wonder if it’s not due to the way I cut the decal and it’s support paper. Maybe I bent the decal film too much with scissors?
Anyway these decal film edges gave me trouble because first silvering happens as the decal edge don’t stick fully to the model and second when you weather the model the oil wash really makes that edge stand out with oil paint getting underneath and making it impossible to swipe it away. That further enhance the visibility of the decal film. A lot of these decals were removed, trashed and replaced. I usually weather after decalling, and this one was no exception, but I had to trash what was done , weather first and then decal to minimize the visibility of the decal film. In many cases the kit decals came to the rescue – especially for the Maltese cross on the wings.
Remains the silvering effect that I sometime had. I don’t use future but X22 Tamiya gloss. Often that is not gloss enough for some decal brand. That’s probably the cause of the issue here as well.
The last issue with the Hahen offering is that the decals are very thin and suffer from colour difference according to the model paint on the background.
If you can bypass the fact that the yellow on the German flag seems wrong from real picture references, it’s also way too transparent and if placed correctly on the model will stand above a border of grey/orange paint and that will be visible through the flag. Not good! So I had to place the flag higher to ensure I didn’t see colour background difference. So I have mixed feelings with the Hahen decals, on one hand they were only a few for Luftwaffe tornadoes (I searched hard for the wingman offering but they were long OOP) but on the other hand the light colours are too transparent (a problem most homemade decals have)
I will take responsibility for the bent edge of films and the silvering effect as this is likely my mistake. Somehow i always use scissors for cutting decals, I either need to change mines or try with a scalpel in the future.
Painting the base
A landing aircraft needs a runway, doesn’t it?
Therefore I quickly made a very simple runway base:

The rust oleum textured paint is just perfect for that. Unfortunately it’s becoming very hard to find over here. Glad i bought some spare the last time i could find them 🙂
It doesn’t need to be further painted as it’s just perfect for a modern and clean runway (and aircraft walkways). The effect is very convincing.
The white line was just masked and painted with Mr surfacer white.

The model was completed Saturday 14th of October at 11.59am and was on the contest table by 13.00 which was the registering deadline of the IPMS belgium weekend.
The tornado took gold in its category (1/48 jet) which wasn’t very rich. But as they say in the airforce: A kill is a kill.


My sincere thanks to Dennis from Germany who was kind enough to help me with the ECR bits. And all my gratitude to DN models for accepting to make the Lego Tiger masks in both 1/48 and 1/32 scale.

Hi, my name is Pedro (I’m from Spain). I would like to tell you several things. The first thing is that I was looking on the web for someone to paint a Tornado with this scheme and I did not find it until now. I’m glad for it and because in addition, the model is well worked (it shows when you put interest to things). Another thing I wanted to tell you is related to the previous one. I have seen your models above and they are really amazing: the perfect messes, the assembly, the painting … Everything. I’m not a modeler because I can not afford (for now) the tools, but I’ve been watching the work of many for years and it helps me learn and especially enjoy this hobby. Therefore, I ask you to NEVER delete / close this page to continue enjoying and, when the time comes, to inspire me in your work [if you do not mind :)]. You already have a new follower.
A warm greeting and congratulations.
Pedro.
P.S. Sorry for my English
LikeLike
Hello Pedro, thank you for your comment. You shouldn’t refrain doing models because you don’t have tools. To begin, all it takes is a bit of glue, a brush and a knife. We all started like that. The rest comes along as you progress. But don’t worry I have no plans to close the blog.
Go for it, start small but start 🙂
LikeLike
Thanks for the advice. So far it’s the best I’ve been given. Now I see I can start modeling, in fact I’m seeing different models. Thanks again and a greeting.
LikeLike
Hi Red Dog. Really incredible work. I’m looking to do the revel ECR tornado in this scheme. I’ve tracked down the masks from DM Models, however struggling to find decals. Do you think it would be possible that you could maybe send me the files that you used for your 1/48 scale, for me to print out in 1/32 scale? (I’ve nevee printed or made my own decals before but first for everything I suppose). It would be hugely appreciated, as without the decals I can’t build the model and I think you’re the only person on the internet with this design!
Kind Regards,
Scott
LikeLike
Thank you Scott.
I used a mix of decals and masks to be able to finish this one. The hahen decals didn’t leave me a great impression i must say, but i’m sure what they provide you can easily find in 1/32nd scale (german flag, serials and maltese cross) the rest i can easily provide the artwork, no problem. I’ll try to scale this to 1/32 and send it to your email address
LikeLike
Thank you very much!
I did receive your email which I’m very grateful for, however about 5 mins later it disappeared (not too sure what happened there as I didn’t delete it, and it’s not in my deleted items).
Please could I request you resend the file as a PDF to my email address?
Your help is very much appreciated.
Kind regards,
Scott
LikeLike
Will do as soon as i’m home Scott 🙂
LikeLike